With the release of of VCF 4.5 i wanted to get my lab upgraded. The release blog can be found here and the release notes are here
Please note that some of the components within the VCF will still need additional upgrading. Please read the release notes for additional details.
We can start by going to Lifecycle Management -> Bundle management -> Download now. If you do not see the newest releases go to Administration -> Repository settings and add a VMware Customer Connect account that has access to perform downloads.
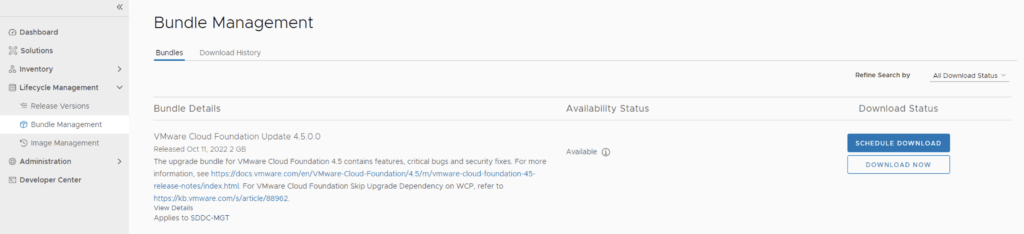
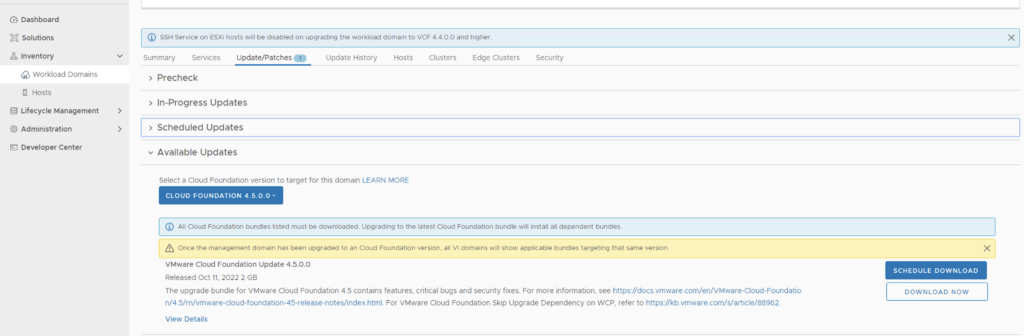
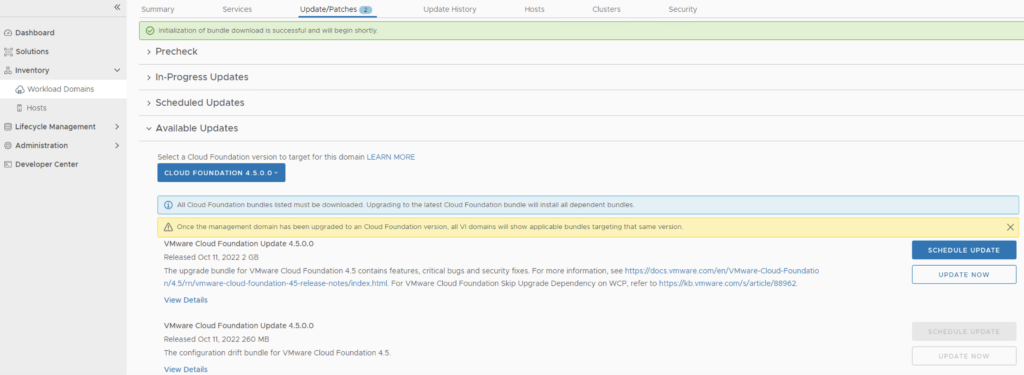
We can also download it directly from the domain by going to Inventory -> Workload Domains -> Select the domain -> Update/Patches -> Select the VCF version -> Download now
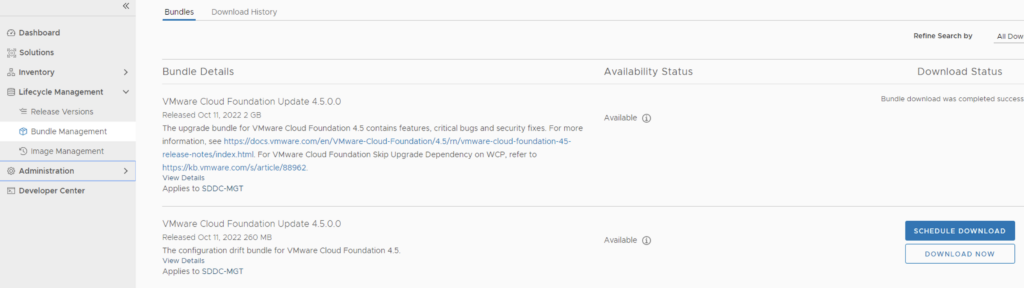
Next we need to download the configuration drift bundle by going to Lifecycle Management -> Bundle Management -> Download now
Alternatively it can also be downloaded directly under the Workload domain Inventory -> Workload Domains -> Select Workload domain -> Updates/Patches -> Select the cloud foundation version and click on Download now
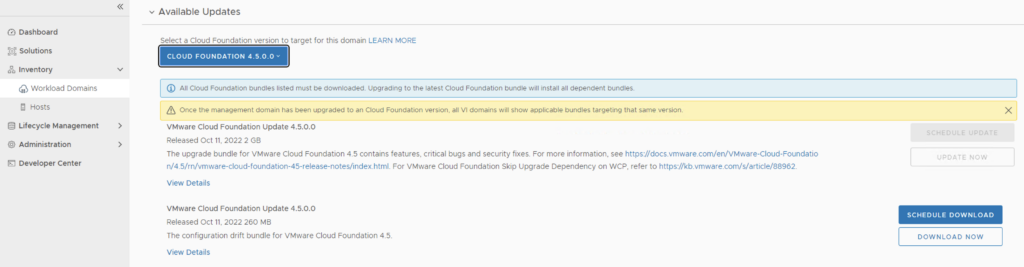
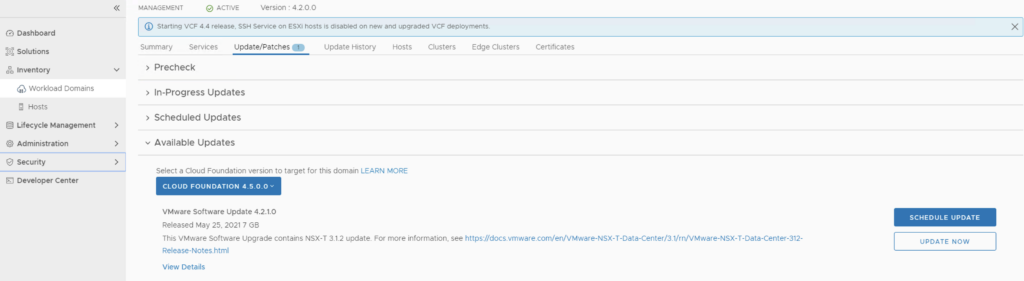
The next step is to upgrade VCF by going to Inventory -> Workload Domains -> Select the workload domain -> Update/Patches -> Select the cloud foundation version we’re upgrading to and click on Update Now for the VMware Cloud Foundation Update 4.5. This will install both the Cloud Foundation update as well as the drift remediation
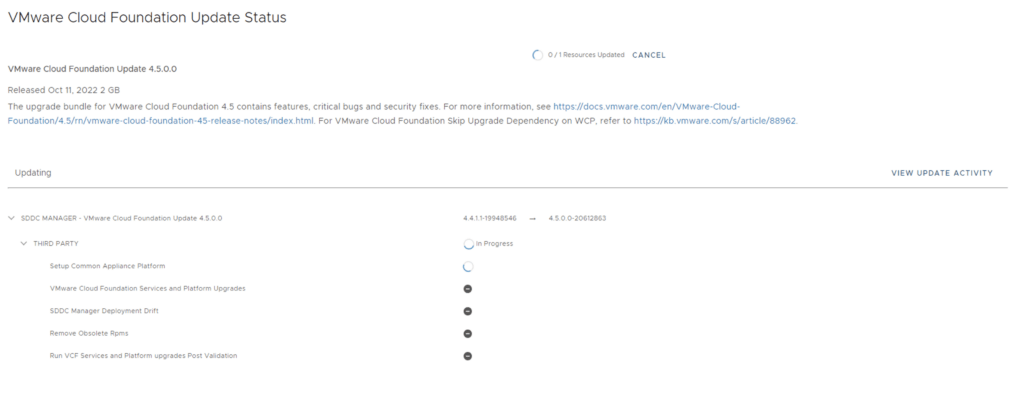
Next we are taken to the Upgrade page where we can follow the upgrade for each one of the components
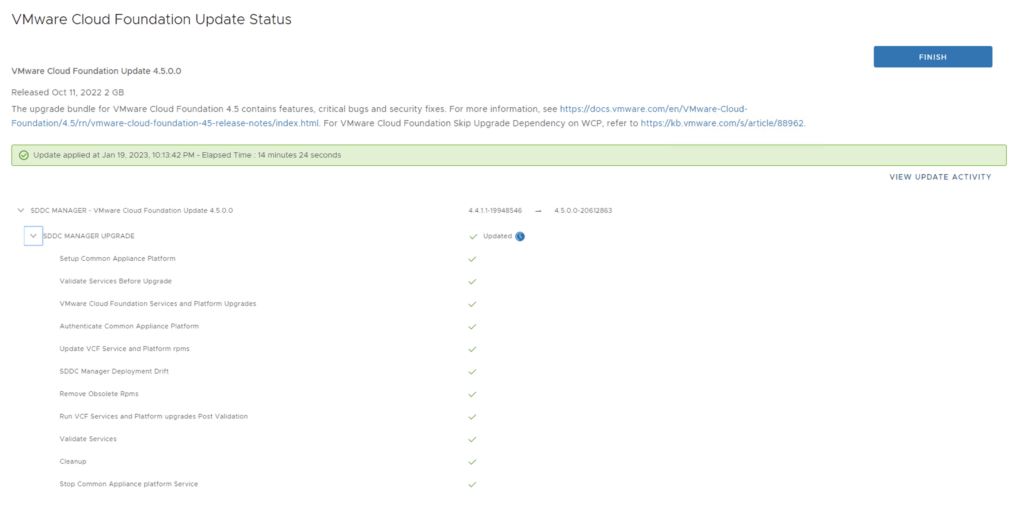
Once the upgrade is complete we can click Finish to be returned back to the main screen
Because we are changing the SDDC-Manager versions i would strongly recommend to clear cache and log back in before going forward.
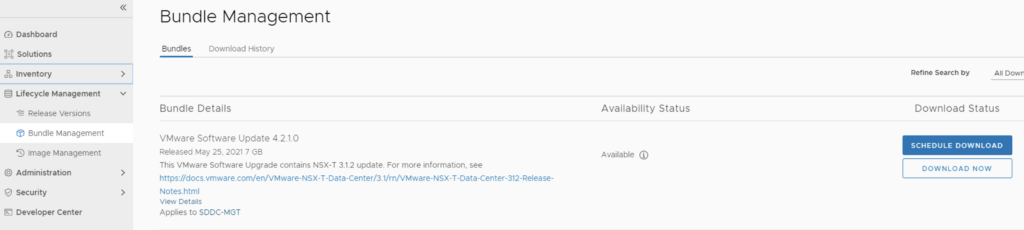
Next step is to upgrade NSX-T installation to NSX-T 3.2.1. The release notes can be found here. We can go to Lifecycle Management -> Bundle Management -> Download now. The 4.5 release actually comes with NSX-T 3.1.3, however because I haven’t upgraded my environment yet, I need to get to 3.1.2 first. The 3.1.3 release notes can be found here and the process is the same.
We can also download it directly from the workload domain by going to Inventory -> Workload Domains -> Select the domain -> Update/Patches -> Select the VCF version -> Download now

Once the download is complete we can proceed with updating the NSX components by clicking on the update now
Make the proper selection and click next

Make the proper selection and click next

Make the proper selection and click next

Review the options and click on Finish

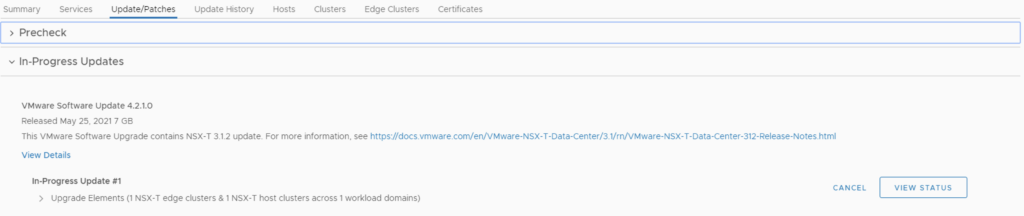
The upgrade will go thought upgrading the NSX edges. We can view the upgrade status by clicking on view status

Once the edges are upgraded we an go back to Inventory -> Workload Domains -> Select the workload domain -> Update/Patches -> Under Available updates click on Update Now

Review the selection and click next

Review the host clusters and click next

Review the upgrade options and click next

Review the selection and click finish

We can view the status of the upgrade by selection view status
Once the upgrade is complete we can proceed with the vCenter Upgrade. VCF 4.5 comes with vCenter Server 7.0 Updated 3h. The release notes can be found here. We can go to inventory -> Workload Domains -> Select the workload domain -> Update/Patches -> Under Available updates click on the drop down and select Cloud Foundation 4.5 -> Download now.

Once the download is complete we can click on Update now

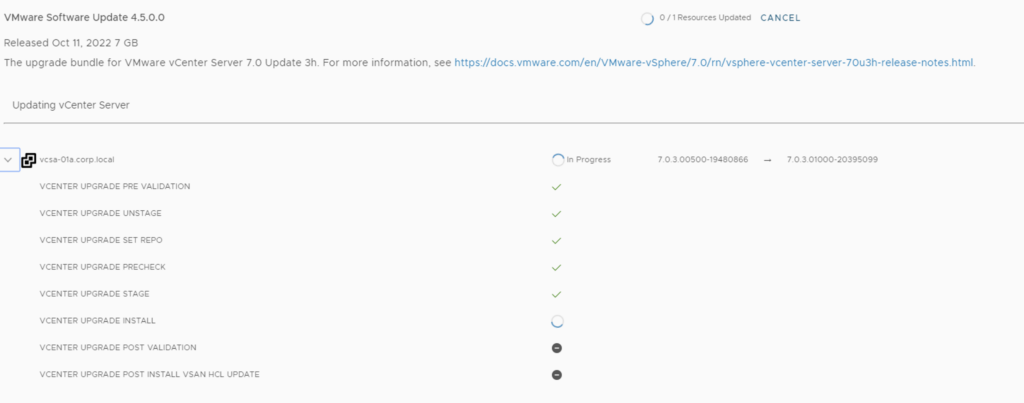
We can follow the status of the upgrade by clicking on the view status tab

Here we can see the different components that are getting upgraded
Once the upgrade is complete we are taken back to the previous page where we can see that the ESXi servers are next. The release notes can be found here. Click on Download Now

Once the download is complete we can click on Update now

If we have multiple clusters we can enable Cluster-level selection and select the specific cluster(s) we want to upgrade.

We can also enable sequential cluster upgrade as well as quick boot

We get to review the options once again before we click finish to to submit the task

Once submitted we can view the status by clicking on View Status

And with that we are finished with the workload domain. We can follow the same steps for the other domains
Don’t forget to clean up the download bundles by following the steps from my other blog here


