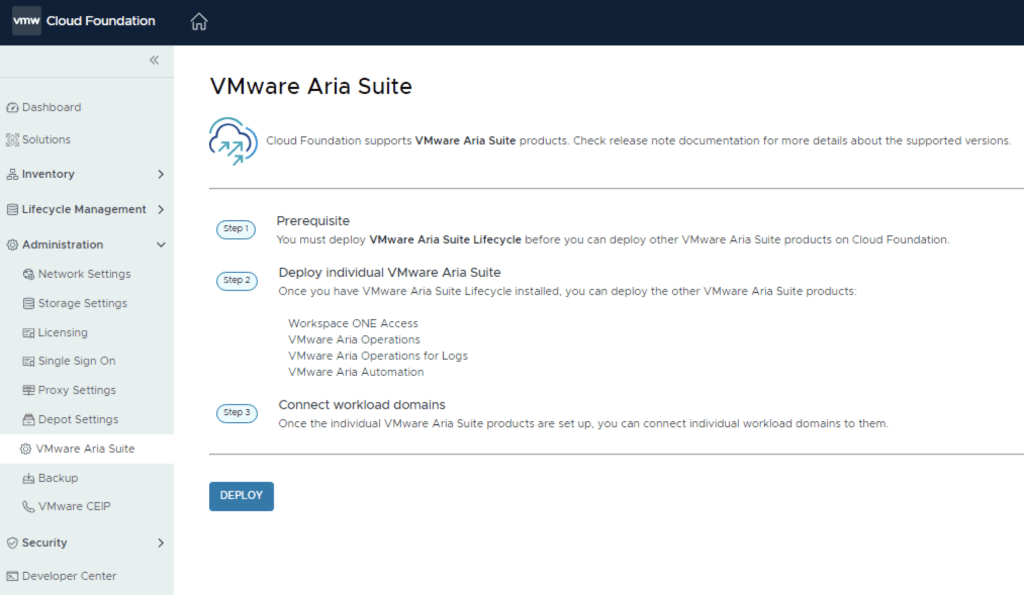
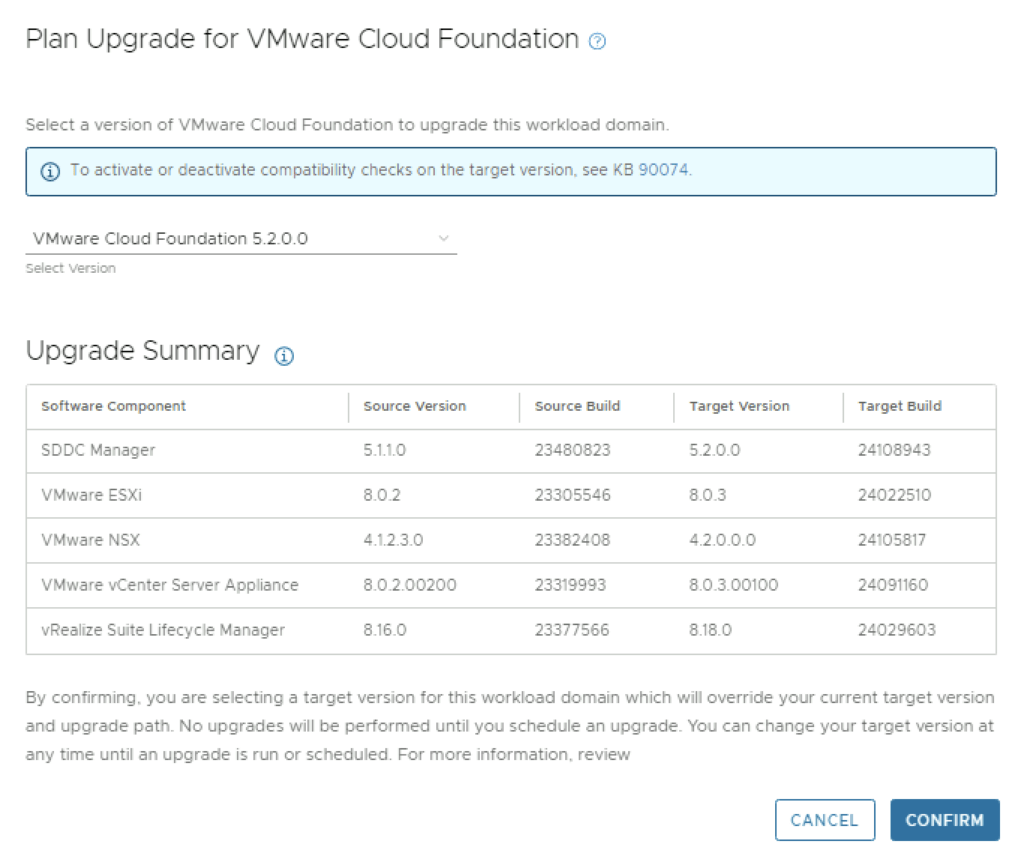
Upgrading VCF 4.4.0 to 4.5 Step by Step

With the release of of VCF 4.5 i wanted to get my lab upgraded. The release blog can be found here and the release notes are here

Please note that some of the components within the VCF will still need additional upgrading. Please read the release notes for additional details.

We can start by going to Lifecycle Management -> Bundle management -> Download now. If you do not see the newest releases go to Administration -> Repository settings and add a VMware Customer Connect account that has access to perform downloads.

We can also download it directly from the domain by going to Inventory -> Workload Domains -> Select the domain -> Update/Patches -> Select the VCF version -> Download now

Next we need to download the configuration drift bundle by going to Lifecycle Management -> Bundle Management -> Download now

Alternatively it can also be downloaded directly under the Workload domain Inventory -> Workload Domains -> Select Workload domain -> Updates/Patches -> Select the cloud foundation version and click on Download now

The next step is to upgrade VCF by going to Inventory -> Workload Domains -> Select the workload domain -> Update/Patches -> Select the cloud foundation version we’re upgrading to and click on Update Now for the VMware Cloud Foundation Update 4.5. This will install both the Cloud Foundation update as well as the drift remediation

Next we are taken to the Upgrade page where we can follow the upgrade for each one of the components

Once the upgrade is complete we can click Finish to be returned back to the main screen

Because we are changing the SDDC-Manager versions i would strongly recommend to clear cache and log back in before going forward.

Next step is to upgrade NSX-T installation to NSX-T 3.2.1. The release notes can be found here. We can go to Lifecycle Management -> Bundle Management -> Download now. The 4.5 release actually comes with NSX-T 3.1.3, however because I haven’t upgraded my environment yet, I need to get to 3.1.2 first. The 3.1.3 release notes can be found here and the process is the same.

We can also download it directly from the workload domain by going to Inventory -> Workload Domains -> Select the domain -> Update/Patches -> Select the VCF version -> Download now

Once the download is complete we can proceed with updating the NSX components by clicking on the update now

Make the proper selection and click next

Make the proper selection and click next

Make the proper selection and click next

Review the options and click on Finish

The upgrade will go thought upgrading the NSX edges. We can view the upgrade status by clicking on view status

Once the edges are upgraded we an go back to Inventory -> Workload Domains -> Select the workload domain -> Update/Patches -> Under Available updates click on Update Now

Review the selection and click next

Review the host clusters and click next

Review the upgrade options and click next

Review the selection and click finish

We can view the status of the upgrade by selection view status

Once the upgrade is complete we can proceed with the vCenter Upgrade. VCF 4.5 comes with vCenter Server 7.0 Updated 3h. The release notes can be found here. We can go to inventory -> Workload Domains -> Select the workload domain -> Update/Patches -> Under Available updates click on the drop down and select Cloud Foundation 4.5 -> Download now.

Once the download is complete we can click on Update now

We can follow the status of the upgrade by clicking on the view status tab

Here we can see the different components that are getting upgraded

Once the upgrade is complete we are taken back to the previous page where we can see that the ESXi servers are next. The release notes can be found here. Click on Download Now

Once the download is complete we can click on Update now

If we have multiple clusters we can enable Cluster-level selection and select the specific cluster(s) we want to upgrade.

We can also enable sequential cluster upgrade as well as quick boot

We get to review the options once again before we click finish to to submit the task

Once submitted we can view the status by clicking on View Status

And with that we are finished with the workload domain. We can follow the same steps for the other domains

Don’t forget to clean up the download bundles by following the steps from my other blog here

Why Choose vRealize Automation (vRA) over Ansible

Ansible and vRealize Automation (vRA) are both popular DevOps tools for infrastructure automation and provisioning. However, the two tools have different strengths and use cases, and choosing the right one for your organization can be a challenge. In this blog post, we’ll explore the key differences between vRA and Ansible and why you might choose vRA over Ansible.

  1. Complexity of Deployment

Ansible is a simple, agentless tool that is easy to install and configure. However, as the complexity of your deployment increases, the simplicity of Ansible can quickly become a hindrance. vRA, on the other hand, is a complex tool that is designed to handle complex deployments, making it an ideal choice for large, complex environments.

  1. Integration with Other Tools

vRA integrates with a wide range of tools, including vSphere, NSX, and vRealize Operations, allowing you to manage and automate the entire software-defined data center. Ansible, on the other hand, does not have this level of integration, which can lead to a more fragmented environment.

  1. User Interfaces

vRA has a rich, web-based interface that allows you to easily manage and automate your infrastructure. The interface is intuitive and easy to use, even for those with limited technical skills. Ansible, on the other hand, is a command-line tool, making it more difficult for non-technical users to use.

  1. Scalability

vRA is designed to scale as your organization grows, allowing you to manage an increasing number of servers and applications. Ansible, while scalable, is not designed to handle the same level of scale as vRA, making it a less ideal choice for large enterprises.

  1. Cost

Ansible is open source, which means that it is free to use. vRA, on the other hand, is a commercial product that requires a license. While the cost of vRA may be a concern, the additional features and capabilities offered by vRA can make it a better choice for organizations that need a more robust automation solution.

In conclusion, while both Ansible and vRealize Automation have their strengths, vRA is a more powerful and scalable solution that is ideal for large, complex environments. The integration with other tools, rich web-based interface, and scalability make vRA a better choice for organizations that need a robust infrastructure automation solution.

Why Choose VMware vRealize Automation Over Puppet

When it comes to managing large, complex IT infrastructure, two of the most popular tools are VMware vRealize Automation (vRA) and Puppet. Both tools have their strengths and weaknesses, but in this article, we will examine why you might choose vRealize Automation over Puppet.

  1. Integrated Management: vRA integrates with VMware’s vSphere virtualization platform, allowing for a seamless management of virtual machines (VMs). With Puppet, you would need to use additional tools to manage your virtual environment.
  2. Cloud Management: vRA is capable of managing both on-premise and cloud infrastructure, making it an ideal solution for hybrid cloud environments. Puppet, on the other hand, is primarily focused on on-premise deployments.
  3. Automation: Automation is at the core of both vRA and Puppet. However, vRA provides a more comprehensive automation solution with its built-in workflows and drag-and-drop design. This makes it easier for users to automate their infrastructure without having to write complex code.
  4. Self-Service: vRA provides a self-service portal for users to request and manage their own resources, reducing the burden on IT. Puppet does not have this capability, making it a less attractive option for organizations looking to implement a self-service model.
  5. Cost: vRA is a commercial product and is typically more expensive than Puppet. However, the added features and integration with other VMware products make it a more cost-effective solution in the long run.

In conclusion, if you are looking for a comprehensive and integrated management solution that covers both on-premise and cloud environments, then vRealize Automation is the way to go. It provides a more user-friendly automation solution, with a self-service portal, making it easier for users to manage their infrastructure. However, if you are on a tight budget and have a primarily on-premise deployment, Puppet might be a better fit for your organization.

Why Choose VMware vRealize Automation (vRA) over Terraform

In the world of infrastructure as code (IAC), there are many tools to choose from. Two popular options are VMware vRealize Automation (vRA) and Terraform. While both have their strengths, there are compelling reasons to choose vRA over Terraform.

  1. End-to-End Automation: vRA automates the entire software-defined data center (SDDC) lifecycle, from provisioning to decommissioning. Terraform is more limited, focusing only on infrastructure provisioning.
  2. User Experience: vRA provides a user-friendly interface, making it easier for non-technical users to request and manage infrastructure. Terraform, on the other hand, requires more technical expertise to use effectively.
  3. Integration with VMware: vRA integrates with other VMware products, such as vSphere, NSX, and vSAN, allowing for a seamless experience. Terraform can also integrate with VMware, but it requires more manual effort to set up the integration.
  4. Enterprise-Grade Security: vRA includes enterprise-grade security features, such as role-based access control and multi-factor authentication. Terraform does not have built-in security features, requiring additional tools or manual effort to secure the environment.
  5. Robust Compliance Features: vRA includes compliance features, such as blueprints that enforce specific policies and standards, making it easier to meet regulatory requirements. Terraform does not have built-in compliance features, leaving it up to the user to ensure compliance.
  6. Strong Support: vRA has a large, global community of users and is backed by VMware, a well-established company in the tech industry. Terraform is a relatively new tool with a smaller community, making support and resources more limited.

In conclusion, vRA offers a complete automation solution for the SDDC, making it a great choice for enterprises that want a user-friendly interface, strong security features, robust compliance features, and strong support. Terraform, while a powerful tool, is better suited for infrastructure provisioning and requires more technical expertise and manual effort to secure and ensure compliance.

Why organizations should choose vRealize Automation as their automation solution

In our previous blog, we discussed the importance of automating virtual infrastructure and why now is the ideal time to do so. In this follow-up blog, we will delve deeper into why organizations should choose vRealize Automation as their automation solution.

  1. Improved efficiency: vRealize Automation streamlines the deployment and management of virtual infrastructure by automating manual processes, reducing the time and effort required to manage virtual resources. This leads to improved operational efficiency and reduces the risk of manual errors, which can be time-consuming and costly to rectify. With vRealize Automation, organizations can deploy and manage virtual resources in a matter of minutes, freeing up valuable IT resources to focus on more important tasks.
  2. Enhanced scalability: As businesses grow, their IT infrastructure must also grow to keep pace. vRealize Automation provides organizations with the ability to scale their virtual infrastructure as their business needs change, ensuring that their IT infrastructure can always meet the demands of their business. With vRealize Automation, organizations can easily deploy new virtual resources as required, without the need for manual intervention.
  3. Improved compliance and security: The deployment and management of virtual infrastructure must comply with various regulations and industry standards, such as HIPAA, PCI DSS, and ISO 27001. vRealize Automation provides robust security and compliance features, ensuring that virtual infrastructure is deployed and managed in a secure and compliant manner. With vRealize Automation, organizations can easily enforce security policies and ensure that their virtual infrastructure is in compliance with industry standards.
  4. Increased collaboration: vRealize Automation integrates with other VMware products, such as vSphere, NSX, and vSAN, enabling organizations to automate their entire virtual infrastructure. This improves collaboration between IT and development teams, as well as between different business units. With vRealize Automation, teams can work together to deploy and manage virtual infrastructure, ensuring that all virtual resources are deployed and managed in a consistent manner.
  5. Increased agility: In today’s fast-paced business environment, organizations must be able to quickly and easily deploy new products and services to meet customer demand. vRealize Automation provides organizations with the ability to quickly and easily deploy and manage virtual infrastructure, reducing the time to market for new products and services. With vRealize Automation, organizations can deploy new virtual resources in minutes, freeing up valuable IT resources to focus on other tasks.

In conclusion, vRealize Automation provides organizations with the tools and capabilities needed to automate their virtual infrastructure, resulting in improved efficiency, scalability, compliance, security, and agility. By automating manual processes, organizations can reduce the time and effort required to manage virtual resources, freeing up valuable IT resources to focus on more important tasks. To learn more about how vRealize Automation can benefit your organization, visit the VMware website.

SaltStack: The Ultimate Tool for Windows Patch Management

Windows systems are vulnerable to security threats and need to be regularly patched to protect against these threats. However, managing patches for a large number of Windows systems can be a tedious and time-consuming task. This is where SaltStack comes in to help.

SaltStack is a popular open-source configuration management and orchestration tool that can be used to manage Windows systems, including patch management. In this blog, we will discuss how to use SaltStack to patch Windows systems.

Installing the Salt Minion on Windows

Before you can use SaltStack to manage Windows systems, you need to install the Salt Minion software on each Windows system you want to manage. The Salt Minion is a lightweight software that allows the Salt Master to communicate with the Windows system and execute commands on it.

To install the Salt Minion on Windows, follow these steps:

  1. Download the Salt Minion MSI package from the SaltStack website.
  2. Double-click the MSI package to start the installation process.
  3. Follow the on-screen instructions to complete the installation.

Once the installation is complete, the Salt Minion will be running on the Windows system and will be ready to receive commands from the Salt Master.

Using the Salt Command to Install Updates

Once the Salt Minion is installed on a Windows system, you can use the salt command to install updates. The salt command allows you to run the built-in win_update module on a specific Windows system to install updates.

For example, the following command will install all available updates on a Windows system with the ID “windows-server-01”:

salt windows-server-name cmd.run 'salt-call win_update.update'

Using the win_updates State Module

SaltStack also provides the win_updates state module to manage updates on Windows systems. The win_updates state module allows you to define the desired state of your Windows systems, including which updates to install.

For example, the following command will install all available updates on all Windows systems managed by SaltStack:

salt '*' state.apply win_updates

Using the winrepo Feature

SaltStack’s winrepo feature allows you to manage custom Windows updates and patch packages. This feature allows you to create a local repository of Windows updates and patches that can be easily distributed to all of your Windows systems.

For example, the following command will update the local repository of custom packages on all Windows systems managed by SaltStack:

salt '*' state.apply winrepo_update

Conclusion

In this blog, we discussed how to use SaltStack to patch Windows systems. SaltStack provides a powerful and flexible solution for Windows patch management, allowing you to manage updates for a large number of Windows systems in an efficient and automated manner.

Whether you are managing a few Windows systems or hundreds, SaltStack is the ultimate tool for Windows patch management. So, start using SaltStack today and make your Windows patch management process a breeze!

vROPs tagging and workload optimization

Optimizing workloads in a custom datacenter with multiple clusters is a challenging task that requires a comprehensive understanding of the underlying infrastructure and the applications running on it. One of the key components of this optimization process is proper tagging using vRealize Operations Manager (vROPs).

Tagging in vROPs is a process of assigning metadata to objects such as virtual machines, hosts, and clusters. This metadata provides context to the objects and helps to categorize them based on their characteristics, making it easier to manage and monitor the infrastructure.

In the context of workload optimization across a custom datacenter with multiple clusters, vROPs tagging plays a critical role in several ways:

  1. Resource Utilization: By tagging objects with relevant metadata, vROPs can provide real-time visibility into the resource utilization of each cluster, allowing administrators to identify over-utilized or under-utilized resources.
  2. Workload Placement: vROPs tagging can be used to determine the most appropriate cluster for a given workload based on its resource requirements and the available resources in each cluster. This helps to ensure that workloads are placed in the right environment to meet their performance and availability requirements.
  3. Capacity Planning: Tagging enables vROPs to gather data on resource utilization trends, which can be used to plan for future capacity needs. This information helps administrators to make informed decisions about resource allocation and identify areas where additional resources may be required.
  4. Compliance and Governance: By tagging objects with relevant metadata, vROPs can enforce compliance and governance policies. For example, administrators can use tags to ensure that sensitive data is stored on compliant clusters or that workloads are placed in clusters that meet specific security requirements.

In conclusion, vROPs tagging is an essential component of workload optimization across a custom datacenter with multiple clusters. It enables administrators to gather real-time visibility into the resource utilization of each cluster, make informed decisions about resource allocation, and enforce compliance and governance policies. By leveraging vROPs tagging, administrators can ensure that their infrastructure is running efficiently, effectively, and securely.

vROPs DRS requirements across multiple data centers

vSphere Resource Management with vRealize Operations (vROPs) DRS across multiple data centers is a critical requirement for managing large-scale virtualized environments. In this blog, we’ll discuss the requirements for using DRS in vROPs across multiple data centers.

  1. Cross vCenter vMotion (CVC-vMotion) Support: CVC-vMotion enables vMotion of virtual machines across multiple vCenter servers. This capability is a pre-requisite for vROPs DRS across multiple data centers.
  2. vCenter Server 6.7 Update 1 or later: vROPs DRS across multiple data centers requires vCenter Server 6.7 Update 1 or later. This ensures that the necessary APIs are available to enable vROPs to manage resources across multiple vCenter servers.
  3. Network Connectivity: All data centers should have a reliable and high-speed network connectivity, with the necessary firewall ports opened for communication between vCenter servers and vROPs instances.
  4. vROPs Replication: vROPs instances in different data centers must be able to communicate with each other. vROPs replication can be used to keep the data in all vROPs instances in sync, ensuring that the vROPs DRS decisions are based on consistent data.
  5. Same vROPs version: All vROPs instances must be running the same version of vROPs to ensure compatibility and prevent any issues with data consistency.
  6. Same vROPs license: All vROPs instances must be licensed with the same vROPs license, and the license should include the vROPs DRS capability.
  7. Cluster Configuration: The virtual machines that need to be managed by vROPs DRS must be in a vSphere cluster that spans across multiple vCenter servers. The vSphere cluster must be configured with the appropriate DRS settings, such as automated DRS, to ensure that vROPs DRS can make effective resource management decisions.

In conclusion, vROPs DRS across multiple data centers is a powerful tool for managing virtualized environments at scale. By following these requirements, organizations can ensure that their vROPs DRS implementation is effective, efficient, and reliable.

DRS Rules in vROPs and vCenter

The Distributed Resource Scheduler (DRS) is a key component of the vSphere platform, and is used to manage resource allocation and workload distribution within virtualized data centers. DRS works by analyzing resource utilization and workload demands of virtual machines (VMs) and making recommendations for placement and resource allocation based on a set of rules.

In the context of vRealize Operations Manager (vROps), DRS rules play an important role in ensuring optimal performance and utilization of virtualized resources. By using vROps, administrators can monitor resource utilization and workload demands in real-time, and make informed decisions about resource allocation based on this data.

There are several types of DRS rules that can be created and configured in vROps, including:

  1. Affinity rules: These rules define the relationships between VMs and specify whether they should run on the same host, or whether they should run on separate hosts. This allows administrators to control the placement of VMs to ensure optimal performance.
  2. Anti-affinity rules: These rules define the relationships between VMs and specify that they should not run on the same host. This helps to ensure that VMs are isolated from each other, and helps to prevent resource contention.
  3. Shares and limits: These rules define the amount of resources (such as CPU, memory, and storage) that should be allocated to each VM. This allows administrators to control resource utilization and ensure that VMs are not over-allocated.
  4. Automation levels: DRS can be configured to operate in either fully-automated or partially-automated mode. In fully-automated mode, DRS makes all placement and resource allocation decisions, while in partially-automated mode, administrators can specify the rules and policies that should be used.

In vCenter, administrators can manage and configure DRS rules through the vCenter Server interface. The vCenter interface provides a graphical interface for creating, editing, and deleting DRS rules, and allows administrators to monitor resource utilization and workload demands in real-time.

In conclusion, the Distributed Resource Scheduler (DRS) rules play a critical role in ensuring optimal performance and utilization of virtualized resources in vSphere environments. By using vROps and vCenter, administrators can monitor resource utilization, configure rules, and make informed decisions about resource allocation to ensure that virtualized resources are used effectively and efficiently.

Enabling Basic authentication in VMware Orchestrator

VMware Orchestrator is a powerful automation platform for administrators. In order to secure the access to the Orchestrator, it is recommended to use Single Sign-On (SSO) authentication. However, there may be instances where SSO is not available and you need to use basic authentication instead (ex: Aria Operations plugin). In this case, you can set the value of com.vmware.o11n.sso.basic-authentication.enabled property to true.

Here are the steps to set com.vmware.o11n.sso.basic-authentication.enabled value in VMware Orchestrator:

  • Access the vRealize Orchestrator configuration interface at https://your_orchestrator_FQDN/vco-controlcenter or https://your_vra_FQDN/vco-controlcenter with the vRA appliance root credentials. This can be done through the vRealize Orchestrator Client by going to “Administration” > “System Properties”.
  • In the “System Properties” section, click on “New”.
  • In the “Property name” field, type “com.vmware.o11n.sso.basic-authentication.enabled”.
  • Change the value to “true”.
  • Click on “Add”.
  • The services vRealize Orchestrator service should automatically restart for the change to affect.
  • Verify that authentication now works

By setting the com.vmware.o11n.sso.basic-authentication.enabled property to true, you can use basic authentication instead of SSO for accessing the VMware Orchestrator. This can be useful when SSO is not available or when you need to use a different authentication mechanism.

Note: If you are using a load balancer for vRealize Orchestrator, you need to set the property on all the vRealize Orchestrator nodes in the cluster.

In conclusion, setting com.vmware.o11n.sso.basic-authentication.enabled value in VMware Orchestrator is a simple process and can be done through the vRealize Orchestrator configuration interface. Just follow the steps outlined in this article and you’ll be up and running in no time!