Suppress ESXi Host Alerts in VCF Operations 9 When a Host Enters Maintenance Mode
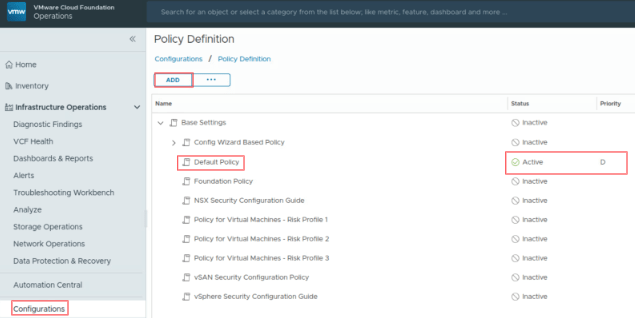
When a vSphere admin places an ESXi host in vCenter maintenance mode, VCF Operations should automatically suppress host alerts for that object, without pausing metric collection, and then restore alerting when maintenance ends. Why this approach? In VCF 9, you can avoid alert noise during maintenance in two ways: Maintenance Schedules – pause both collection and alerts during a defined window (best for planned maintenance). Policy-based alert suppression (this post) – keep metrics flowing but disable host alert definitions while the host is in maintenance. This is done with a policy attached to a dynamic custom group keyed to the host’s Maintenance Mode property. Note on naming: In VCF 9, VCF Operations is the successor to Aria/vRealize Operations and is part of the unified Cloud Foundation experience. If you’re upgrading from Aria Operations, see Broadcom’s “Upgrade to VCF Operations 9.0.” ...