In this blog we will go over replacing the LocalManager certificate in NSX. In this example I will be using the UI to generate the self signed certificate and then an API call to replace the certificate.
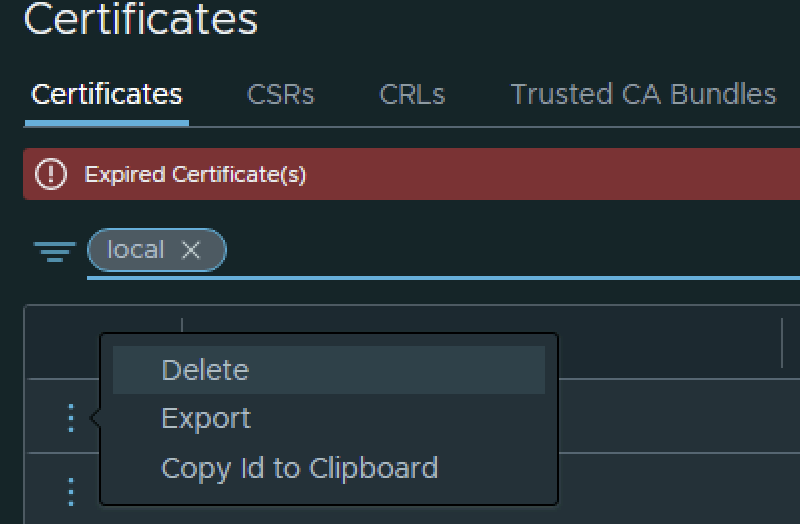
In my case the LocalManager certificate has already expired
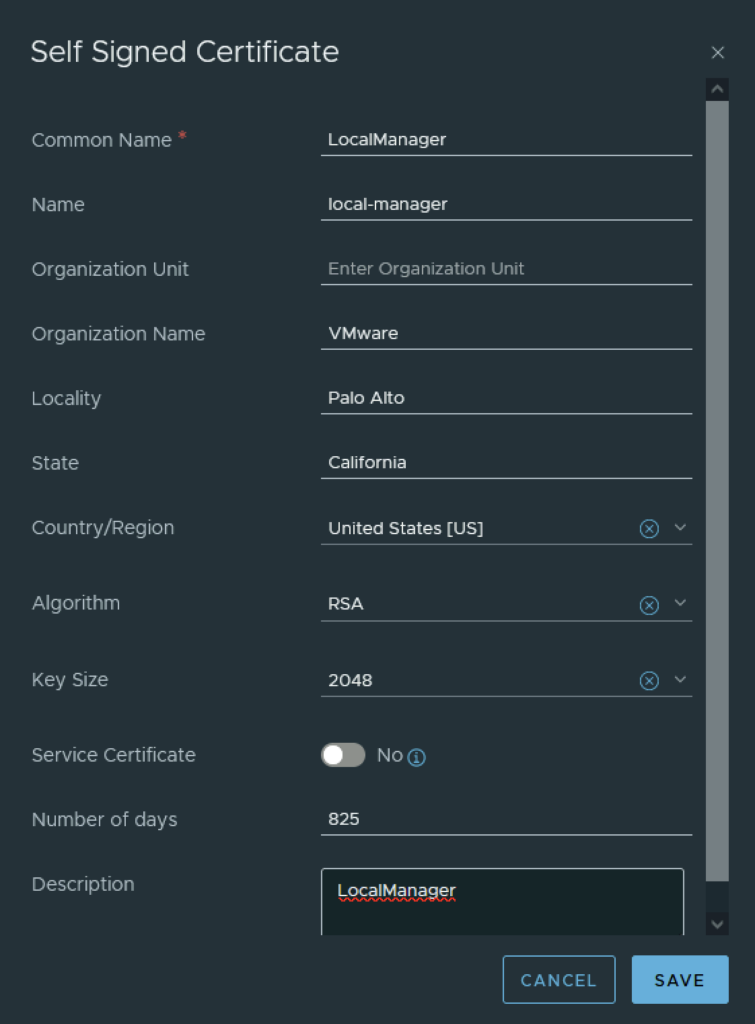
In the top menu bar I went to Generate -> Generate Self Signed Certificate
Next I had to grab the new certificate ID
The next step is to replace the old certificate with the new certificate via an API call. For this I used Postman but any other tool could potentially be used.
The URL for the post call would go against https://nsx_fqdn/api/v1/trust-management/certificates?action=set_pi_certificate_for_federation
For authentication I used basic, per best practices we should be using a token.
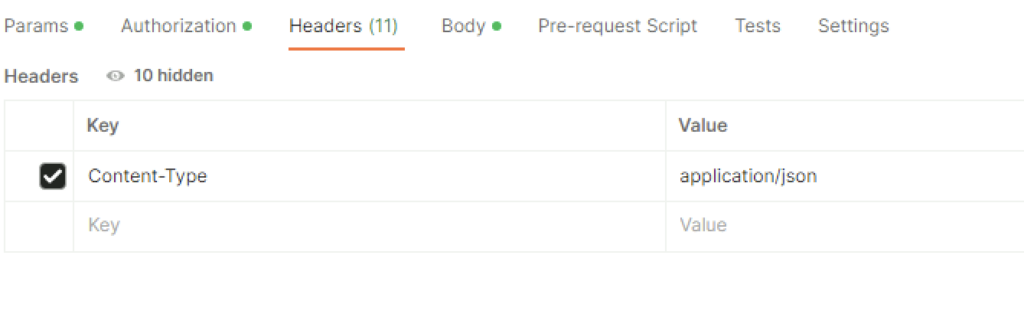
For headers had to add Content-Type application\json ex
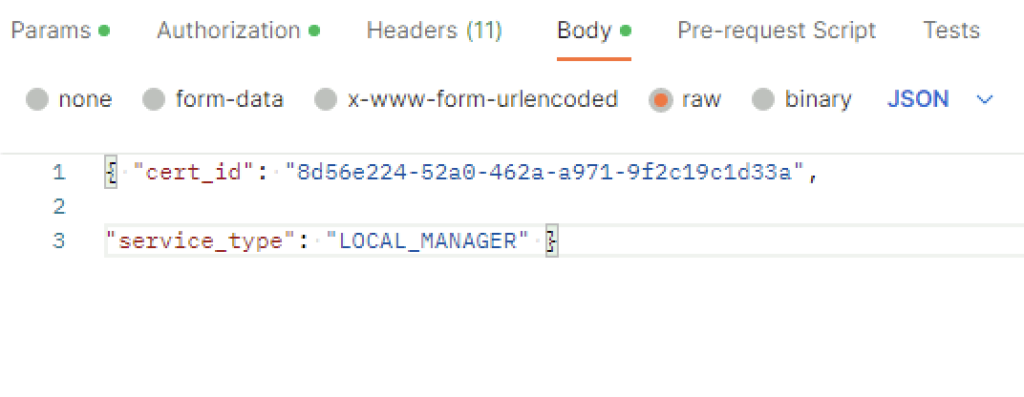
In the body I picket raw and added the following in
VMware Cloud Foundation (VCF) has revolutionized data center virtualization by seamlessly integrating compute, storage, and networking components. In a VCF environment, the NSX platform provides crucial software-defined networking capabilities. At times, removing NSX edges becomes necessary due to infrastructure changes, optimization efforts, or other reasons. To simplify this process, VMware has introduced the NSX Edge Removal Tool. In this blog post, we will explore how this tool can streamline the removal of NSX edges in a VCF environment while preserving dependencies.
Understanding the NSX Edge Removal Tool
The NSX Edge Removal Tool is a powerful utility developed by VMware to assist with removing NSX edges in a VCF environment. It simplifies the edge removal process and ensures the preservation of critical dependencies. Let’s delve into the steps involved in using this tool effectively.
Step 1: Preparing for NSX Edge Removal
Before utilizing the NSX Edge Removal Tool, it is crucial to thoroughly understand your VCF environment and identify all dependencies associated with the NSX edges you plan to remove. Review your network configuration, firewall rules, security policies, and any applications or services relying on the edges. This assessment will help you plan and execute the edge removal process more efficiently.
Step 2: Installing and Configuring the NSX Edge Removal Tool
To begin, download the NSX Edge Removal Tool from the VMware website. As of the writing of this blog the latest download can be found here. Follow the installation and configuration instructions provided by VMware to integrate the tool into your VCF environment seamlessly. Ensure that you have the necessary credentials and permissions to access and modify the NSX edges. In my case I downloaded edge_cluster_cleaner_0.27.tar.gz and transferred it to the server.
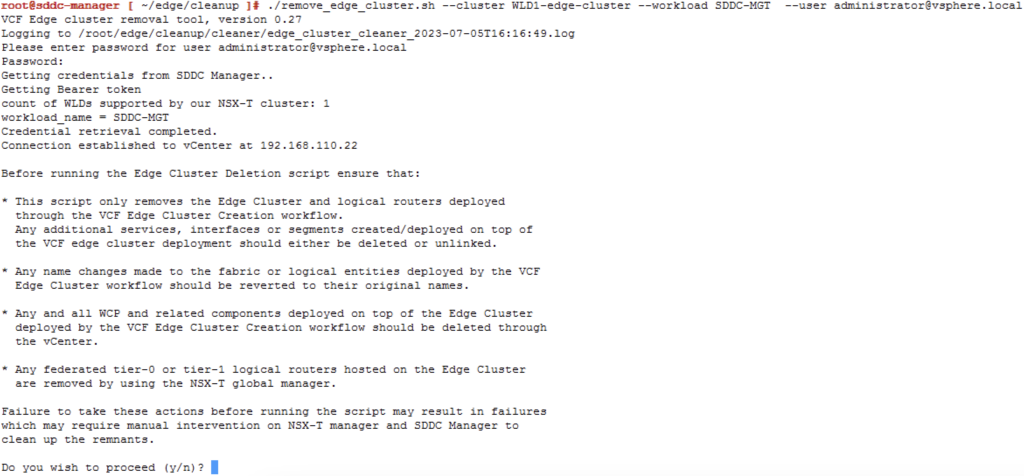
Step 3: Running the NSX Edge Removal Tool
Once the tool is installed and configured, it’s time to execute the removal process. Launch the NSX Edge Removal Tool and provide the required information, such as the NSX Manager IP address, credentials, and the specific edges you wish to remove. The tool will validate the environment and dependencies, ensuring a safe removal process. ex ./remove_edge_cluster.sh --cluster WLD1-edge-cluster --workload SDDC-MGT --user [email protected]
Step 4: Verifying and Analyzing the Dependency Report
After executing the removal process, the NSX Edge Removal Tool generates a dependency report. This report provides crucial insights into the dependencies associated with the removed NSX edges. Review the report thoroughly to understand any potential impacts on your network infrastructure and applications.
Step 5: Addressing Dependencies and Network Adjustments
Based on the generated dependency report, it’s essential to address the identified dependencies and make necessary adjustments to your network configuration. Collaborate with network administrators, application owners, and other stakeholders to migrate the dependencies to alternative network resources. Update firewall rules, adjust routing configurations, and ensure seamless connectivity for critical services.
Step 6: Post-Removal Validation and Testing
After addressing the dependencies and making the required adjustments, perform comprehensive validation and testing to ensure that the network connectivity and critical services are functioning optimally. Monitor the network closely for any abnormalities or performance issues, and address them promptly.
Conclusion
The NSX Edge Removal Tool provides a streamlined approach to removing NSX edges in a VMware Cloud Foundation (VCF) environment while preserving critical dependencies. By following the steps outlined in this blog post and utilizing the tool effectively, you can simplify the edge removal process and ensure the smooth operation of your VCF environment. Embrace this tool to optimize your network infrastructure and enhance the agility of your virtualized data center.
I wanted to reuse my VCF downloaded bundles on another SDDC Manager system so that i wont have to download it from internet again. I found an easy guide here in the VMware documentation. My goal was to download the specific bundle once and upload it on other SDDC Managers.
The first command from SDDC manager was to list the bundles. The lcm bundle transfer utility can be found in /opt/vmware/vcf/lcm/lcm-tools/bin
I replaced the ${depotUser} with my vmware email address and ${product_version} with the version of the VCF product i wanted to install in my case 5.0.0.0. I was greeted with a list of bundle IDs and the specific component that it was for:
Enter Myvmware user password:
Validating the depot user credentials...

Bundle         Product  Bundle Size  Components
               Version  (in MB)
bundle-80035   5.0.0.0  599.5 MB     ESX_HOST-8.0.1-21813344
bundle-80031   5.0.0.0  10089.9 MB   NSX_T_MANAGER-4.1.0.2.0-21761691
bundle-80029   5.0.0.0  2044.7 MB    SDDC_MANAGER_VCF-5.0.0.0-21822418
bundle-80030   5.0.0.0  251.3 MB     SDDC_MANAGER_VCF-5.0.0.0-21822418
bundle-80033   5.0.0.0  9867.6 MB    VCENTER-8.0.1.00100-21815093
In my case i need the installer. To download a specific bundle we run
This allowed me to grab the download from /some/temporary/path and save it/upload it on my other SDDC Managers that were missing it.
Finally before the patch can be used in SDDC Manager we need to upload it to the repo. Please note that once we issue the upload command the download gets deleted, so make sure you save the download ahead of time
With the release of of VCF 5 I wanted to get my lab upgraded. The release blog can be found here and the release notes are here
Please note that some of the components within the VCF will still need additional upgrading. Please read the release notes for additional details.
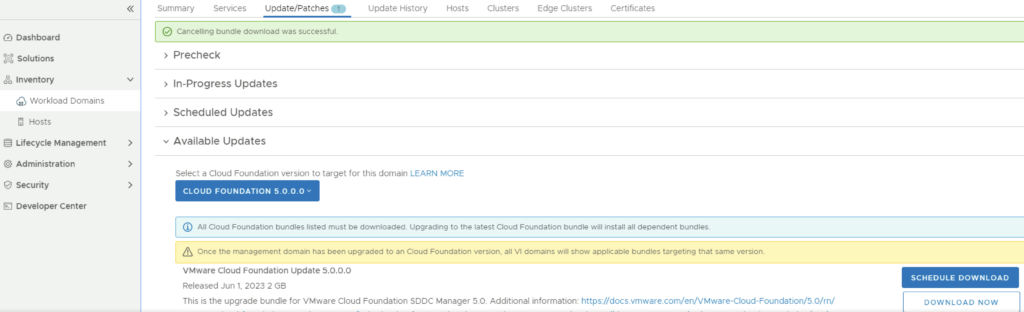
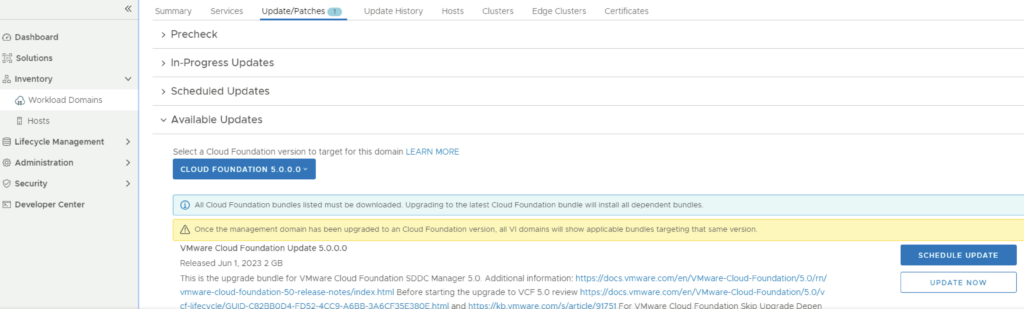
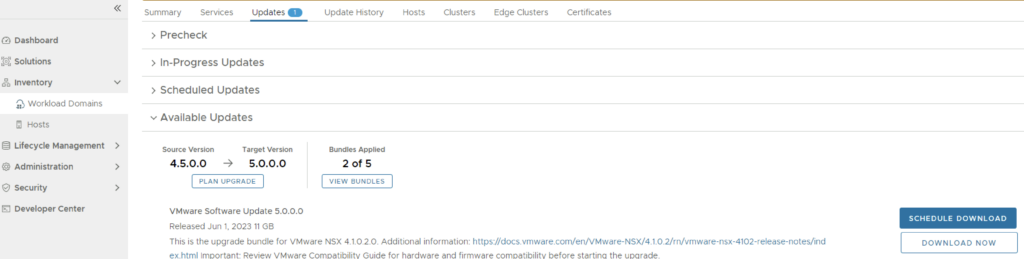
We can start by going to Inventory -> Workload Domains -> Select the domain -> Update/Patches -> Select the VCF version -> Download now. If you do not see the newest releases go to Administration -> Online Depot and add a VMware Customer Connect account that has access to perform downloads.
We can also download it directly from the domain by going to Inventory -> Workload Domains -> Select the domain -> Update/Patches -> Select the VCF version -> Download now
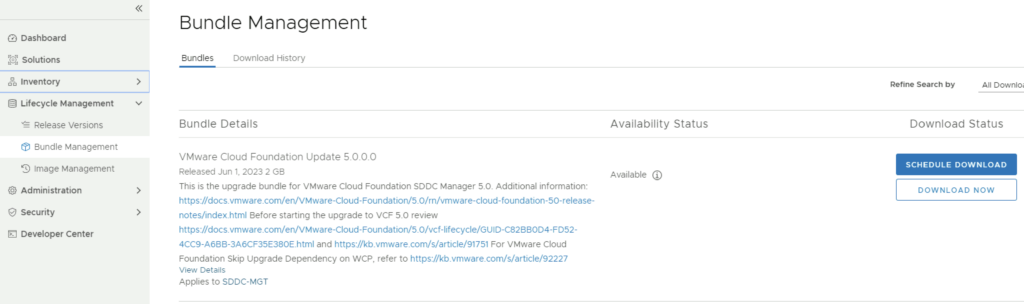
Next we need to download the configuration drift bundle by going to Lifecycle Management -> Bundle Management -> Download now
The next step is to upgrade VCF by going to Inventory -> Workload Domains -> Select the workload domain -> Update/Patches -> Select the cloud foundation version we’re upgrading to and click on Update Now for the VMware Cloud Foundation Update 5.0
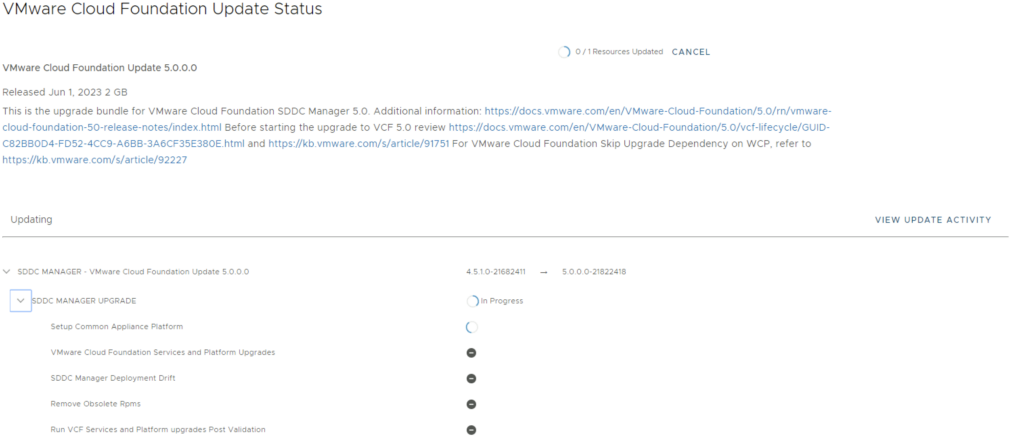
Next we are taken to the Upgrade page where we can follow the upgrade for each one of the components
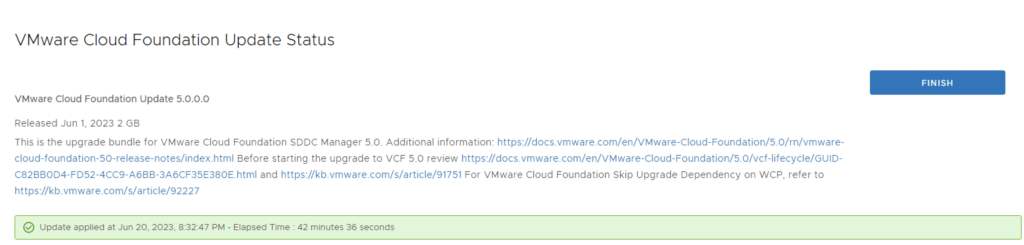
Once the upgrade is complete we can click Finish to be returned back to the main screen
Because we are changing the SDDC-Manager versions i would strongly recommend to clear cache and log back in before going forward.
The next step is the drift remediation VCF by going to Inventory -> Workload Domains -> Select the workload domain -> Update/Patches -> click on Update Now for the VMware Cloud Foundation Update 5.0
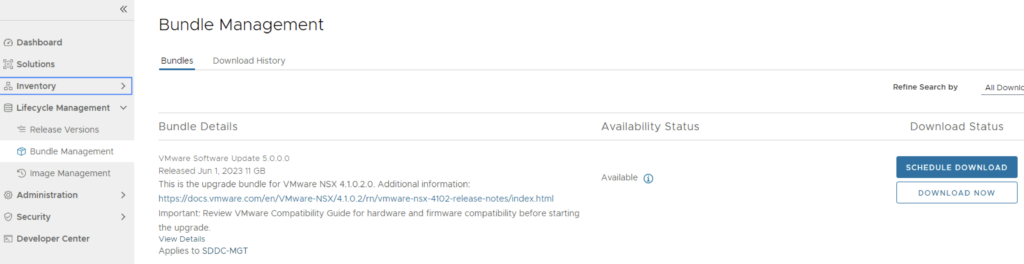
Next step is to upgrade NSX-T installation to NSX-T 4.1.0.2.0. The release notes can be found here. We can go to Lifecycle Management -> Bundle Management -> Download now.
We can also download it directly from the workload domain by going to Inventory -> Workload Domains -> Select the domain -> Update/Patches -> Download now
Once the download is complete we can proceed with updating the NSX components by clicking on the update now
Make the proper selection and click next
Make the proper selection and click next
Make the proper selection and click next
Review the options and click on Finish
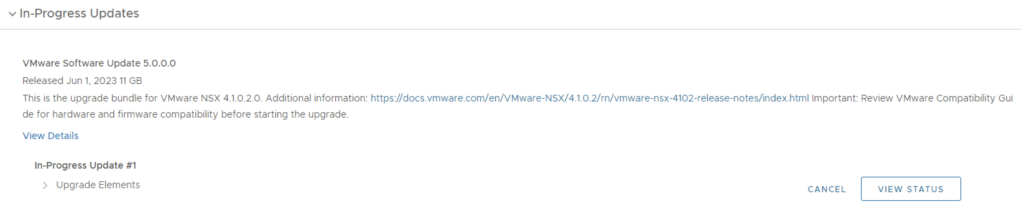
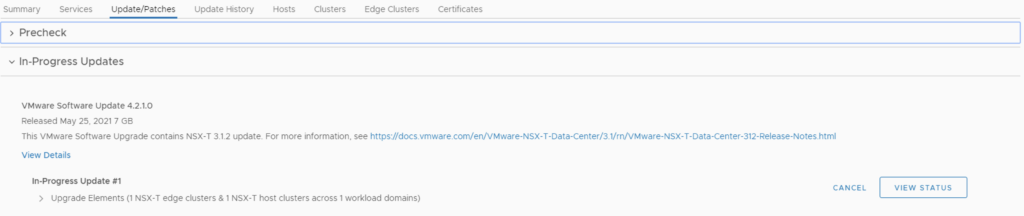
The upgrade will go thought upgrading the NSX edges. We can view the upgrade status by clicking on view status
Once the edges are upgraded we an go back to Inventory -> Workload Domains -> Select the workload domain -> Update/Patches -> Under Available updates click on Update Now
Review the selection and click next
Review the host clusters and click next
Review the upgrade options and click next
Review the selection and click finish
We can view the status of the upgrade by selection view status
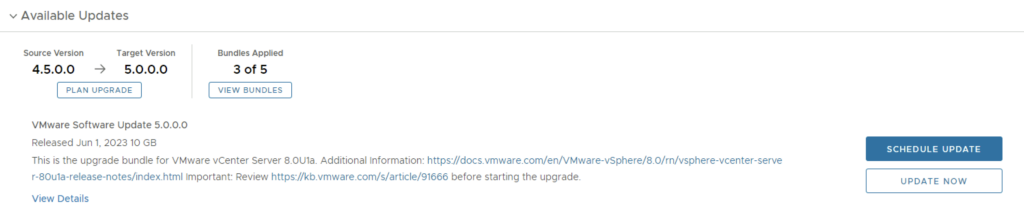
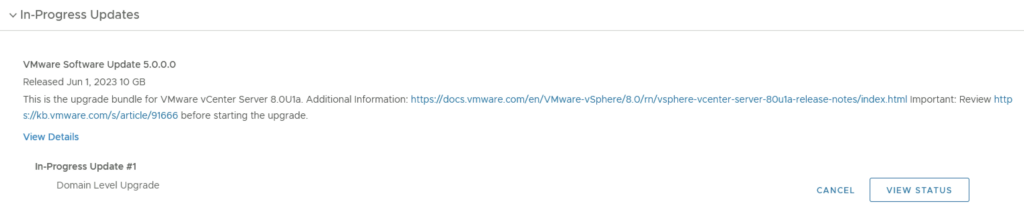
Once the upgrade is complete we can proceed with the vCenter Upgrade. VCF 5 comes with vCenter Server 8.0 Updated 1a. The release notes can be found here. We can go to inventory -> Workload Domains -> Select the workload domain -> Update/Patches -> Under Available updates click on Download now.
Once the download is complete we can click on Update now
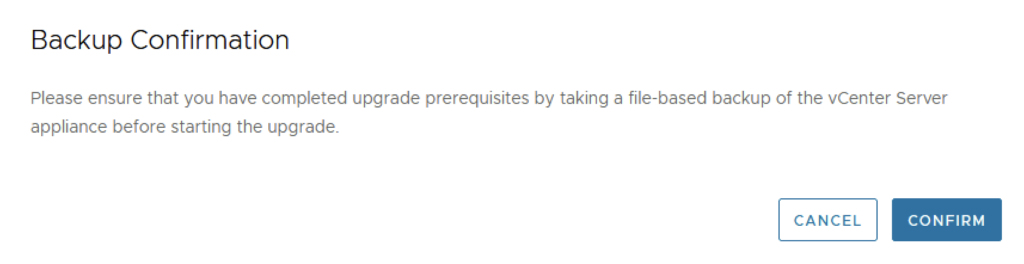
Confirm that we have a backup
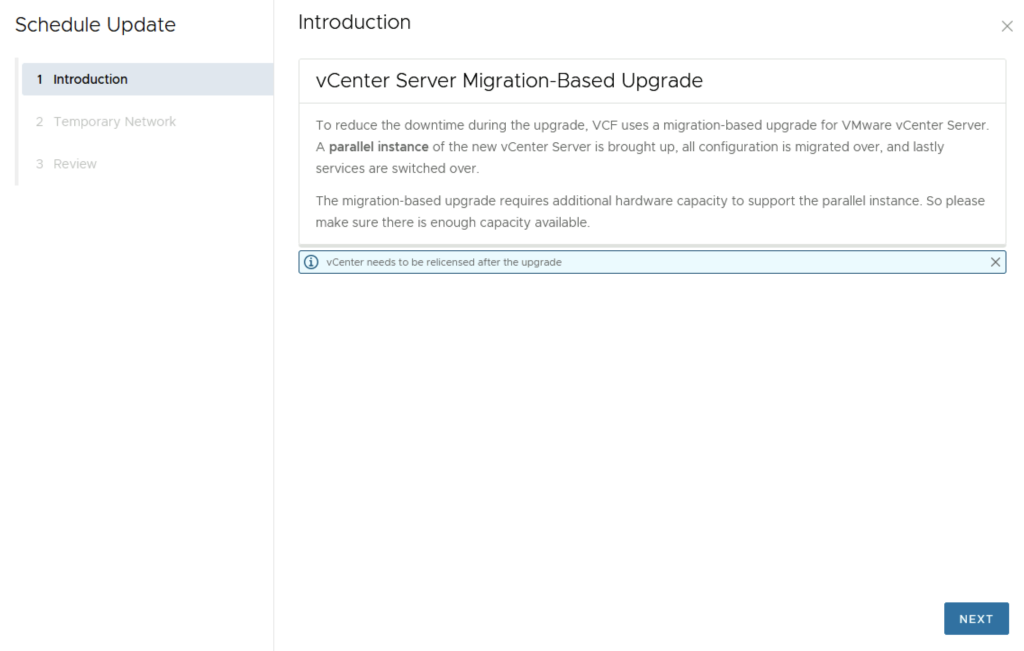
Considering that the vCenter upgrade is not in place we are presented with a wizard that can automate most of the background work for us. Click next
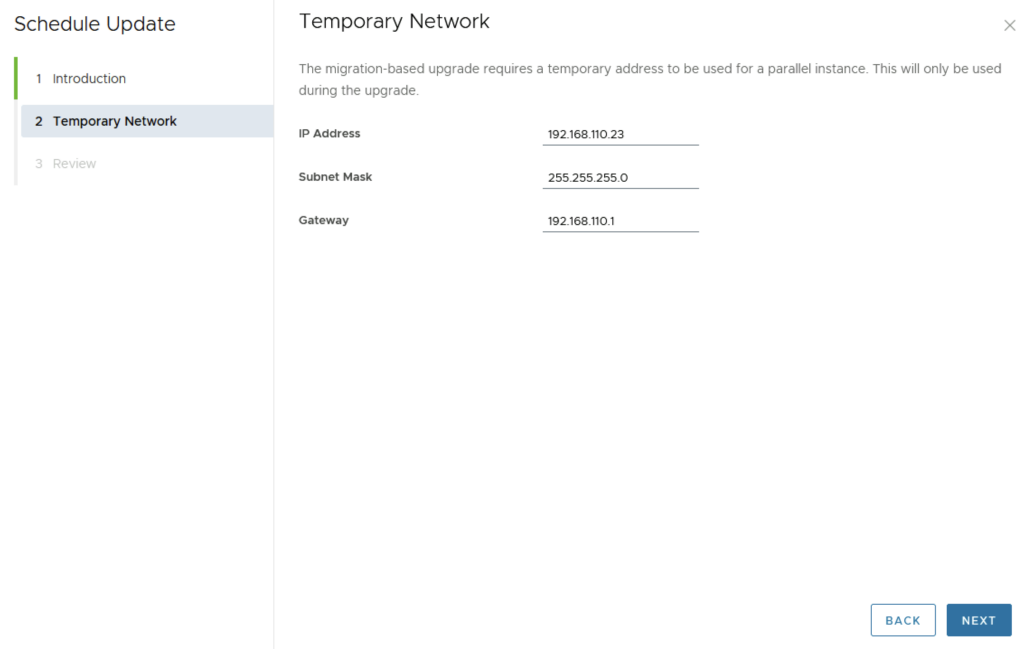
Provide a temporary IP for the temporary appliance
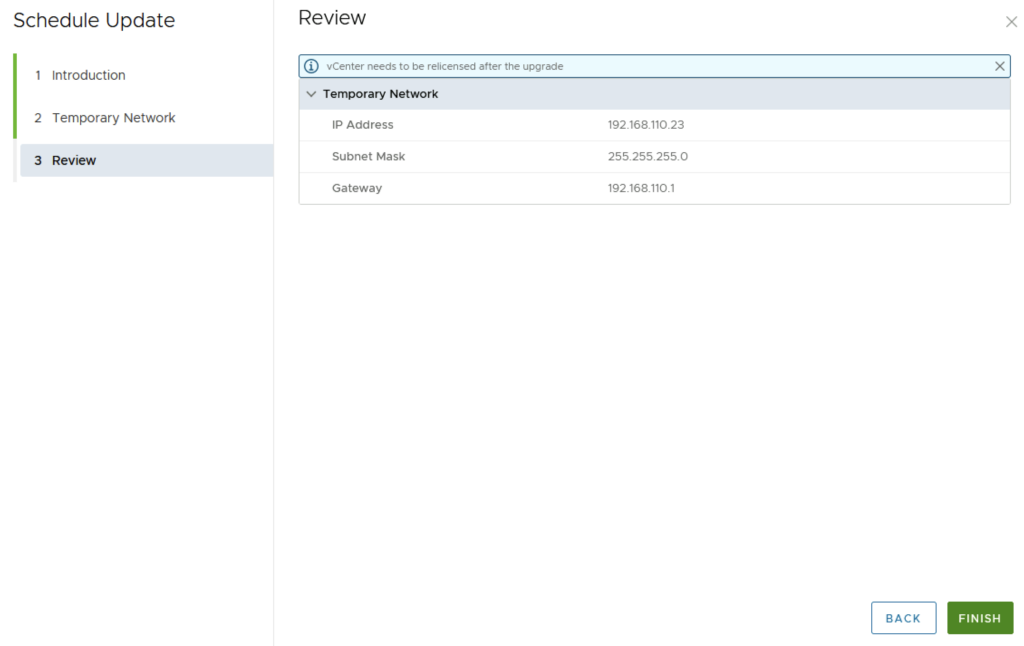
Review the information and click Finish
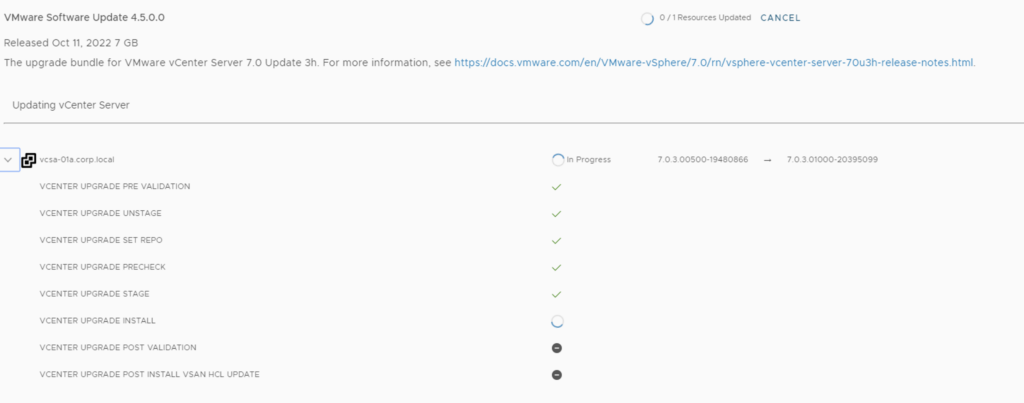
We can follow the status of the upgrade by clicking on the view status tab
Here we can see the different components that are getting upgraded
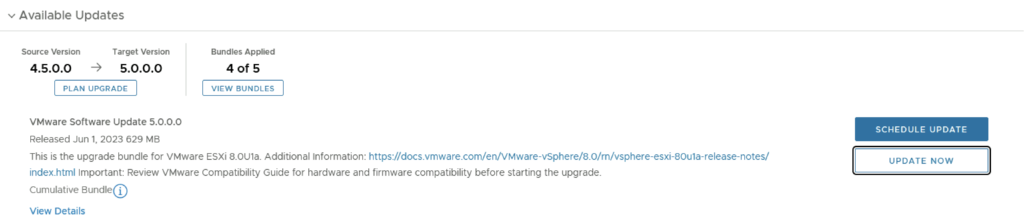
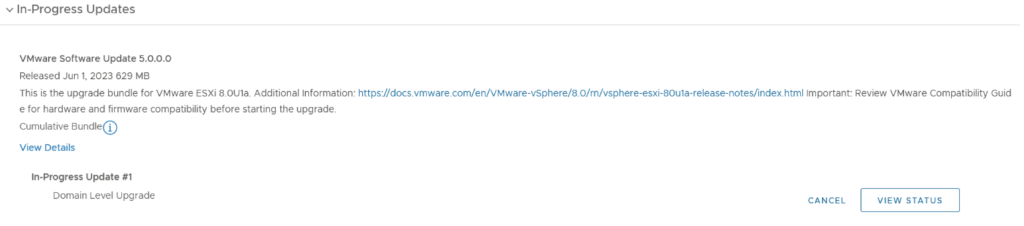
Once the upgrade is complete we are taken back to the previous page where we can see that the ESXi servers are next. The release notes can be found here. Click on Download Now
Once the download is complete we can click on Update now
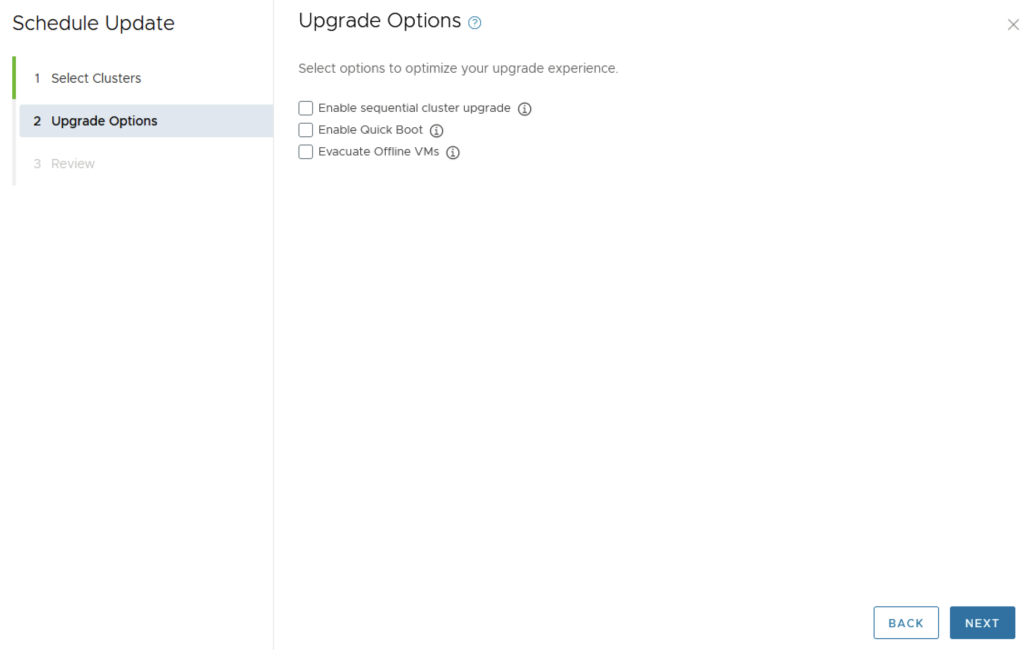
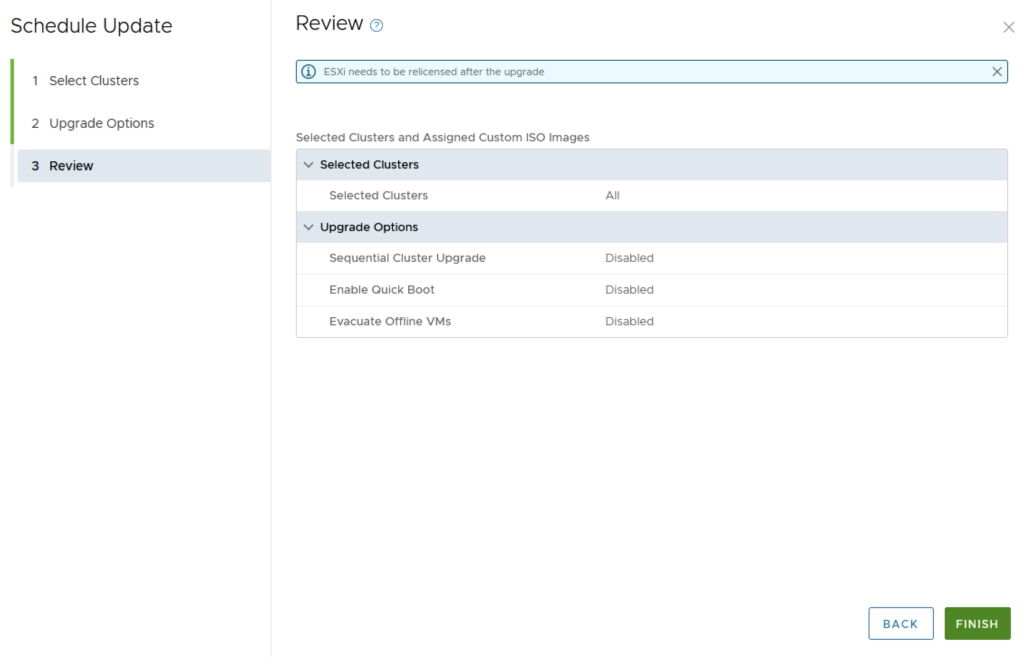
If we have multiple clusters we can enable Cluster-level selection and select the specific cluster(s) we want to upgrade.
We can also enable sequential cluster upgrade, quick boot and the ability to evacuate offline VMs part of the maintenance. Click Next
We get to review the options once again before we click finish to to submit the task
Once submitted we can view the status by clicking on View Status
And with that we are finished with the workload domain. We can follow the same steps for the other domains
Don’t forget to clean up the download bundles by following the steps from my other blog here
In this guide i will go over the steps of getting an existing 8.x vRSLCM appliance upgraded to the latest 8.12 release. The release notes can be found here
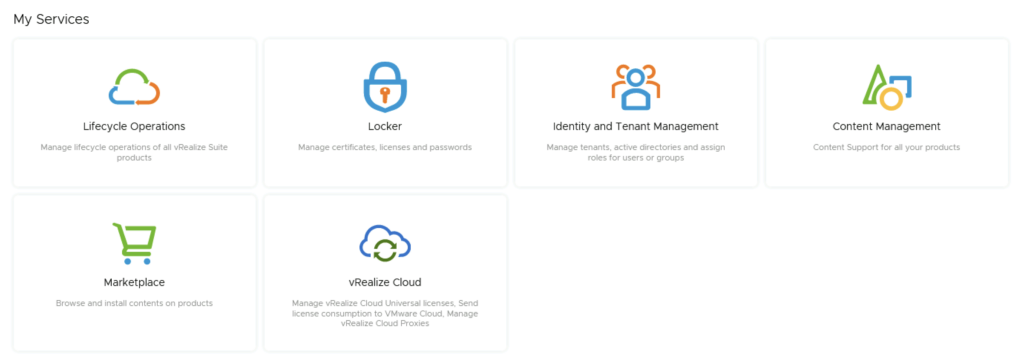
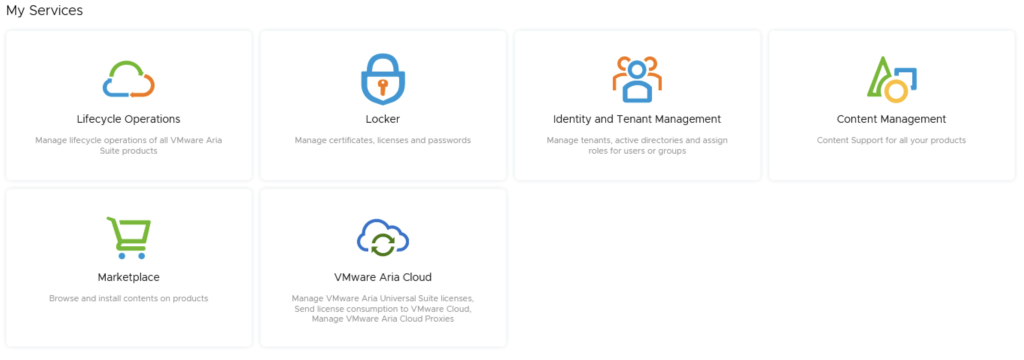
The first step is to log in to vRealize Suite Lifecycle Manager under the Lifecycle Operations section
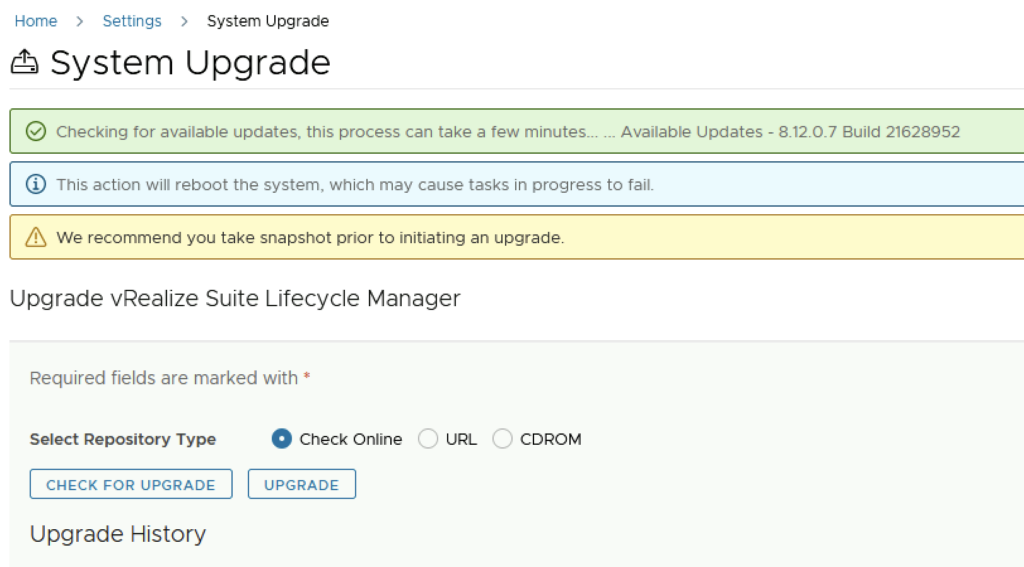
Go to settings -> System Upgrade
Click on Check for Upgrade
We can see that the check found a new version available for 8.12
Click on Upgrade
Verify that a snapshot or backup exists in case the process fails. Check the check mark for I took a snapshot of the vRealize Suite Lifecycle Manager before I performed this operation. Click Next
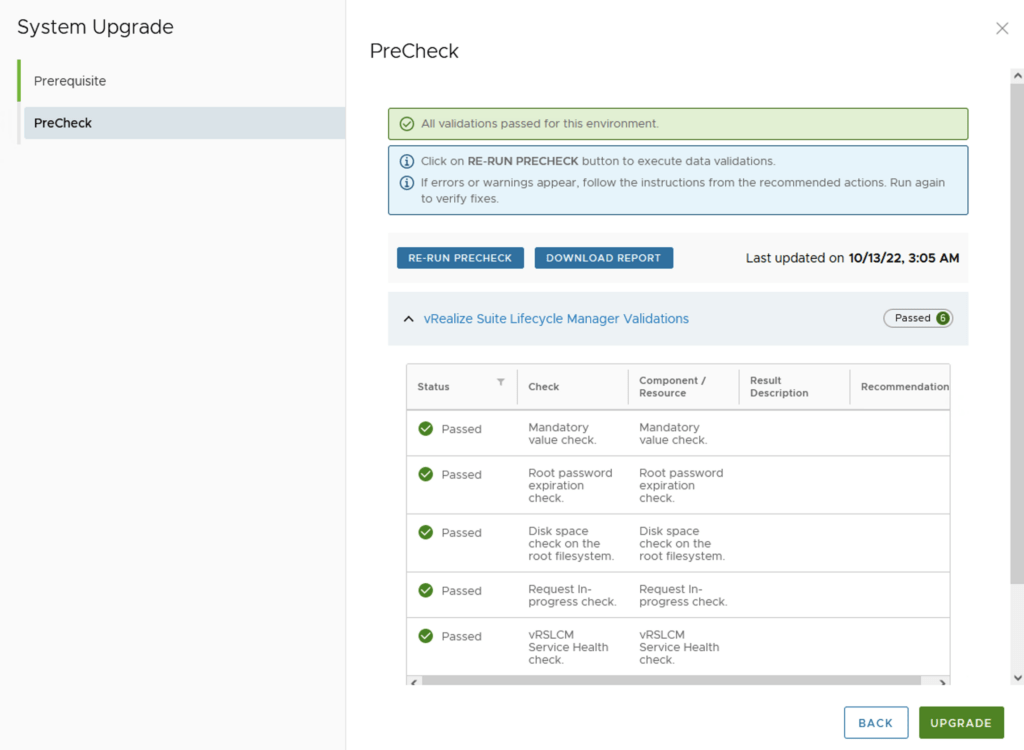
Click on Run Precheck
Verify that all check have passed and click on upgrade
This will fire up the upgrade process and start upgrading packages. The system will automatically reboot on 8.12 once completed. We can check the version by going to Settings -> System Details
If you get the below error clear the browser cache and try again
In this post i will go over upgrading my 8.x SSC appliance to 8.12.1. As a pre requirement we do need to have VMware Aria Suite Lifecycle upgraded to 8.12. Instructions can be found here. The upgrade does not include the latest PSPACK that contains the 8.12.1 SaltStack Config release. Instructions to get the PSPACK can be found on my other blog post here.
To get started we can go to vRealize Lifecycle Manager -> Lifecycle Operations -> Settings -> Binary Mapping. (If you haven’t added your My VMware credentials you will need to do that first by going to vRealize Lifecycle Manager -> Lifecycle Operations -> Settings -> My VMware)
Click on Add Binaries under Product Binaries
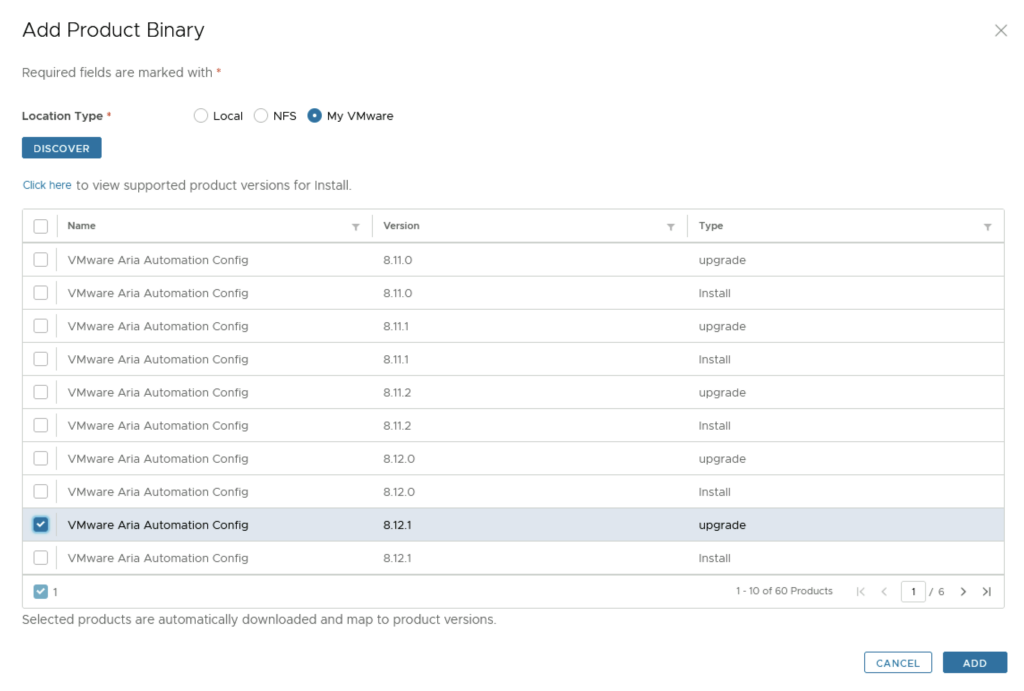
Select My VMware and click on Discover
We can see a list of binaries that have been discovered. We can select what we need and click on Add
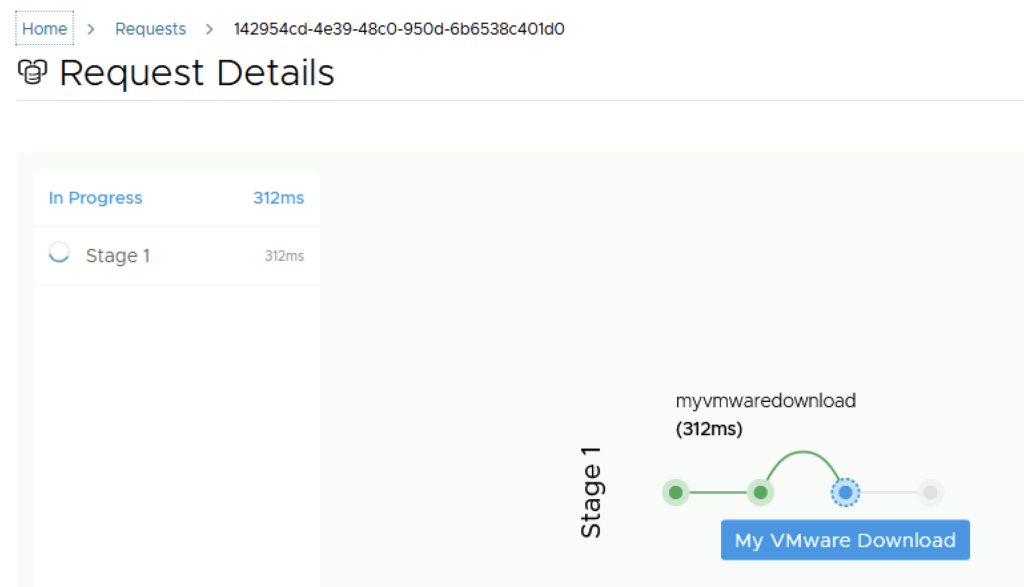
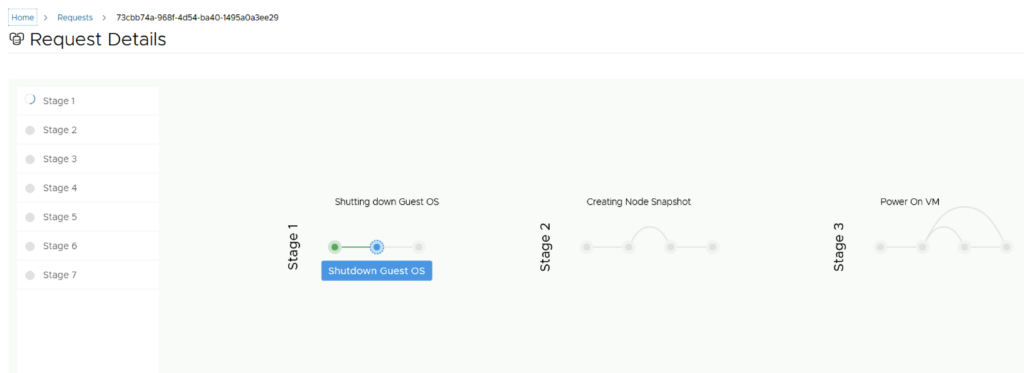
This will create a request and start downloading the package. To view the progress we can click on the Click Here hyperlink
Click on the in Progress button to view the details
We now have to wait for the download to complete
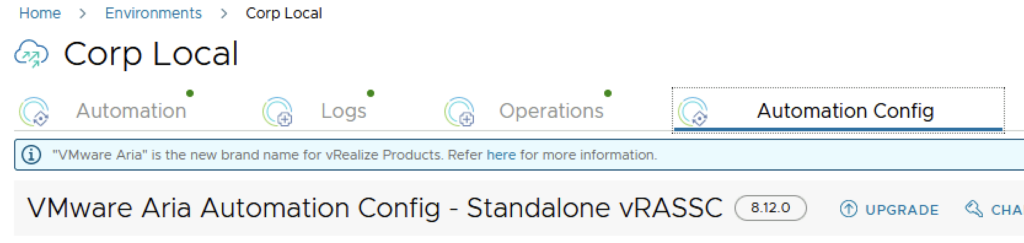
After the download is complete we can go to Environments -> View Details on the environment that includes SSC
Click on Upgrade
An Inventory sync is recommended if the environment has changed since LCM performed the last sync. We trigger the sync from the UI or click on Proceed to continue
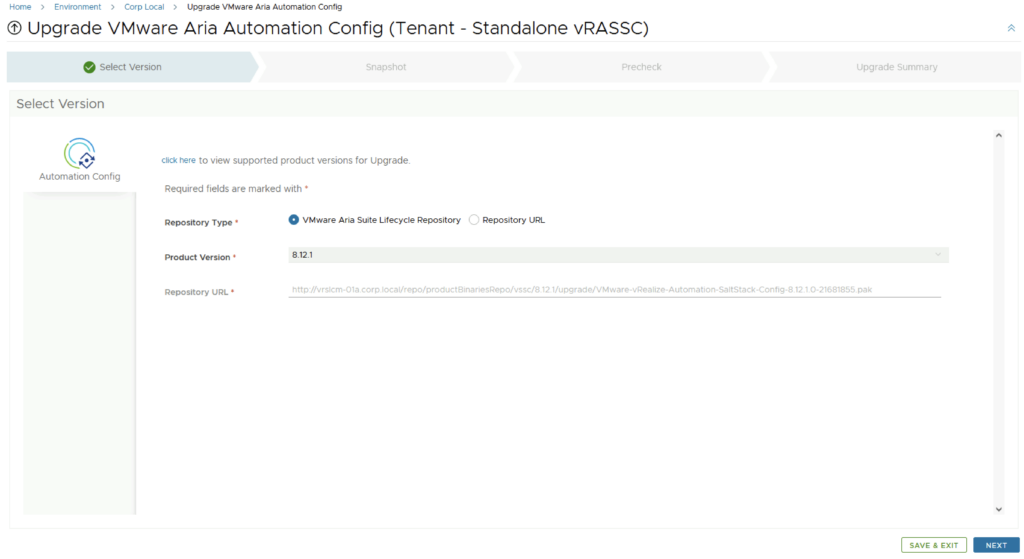
Select product Version 8.12.1 and click Next. We can also review the compatibility matrix to make sure the environment is compatible.
We can automatically create and delete a snapshot part of the upgrade process
Run the Precheck to make sure there are no errors
Once the check is complete, click on Next. Review the upgrade details and click on Next. We are taken to the progress screen where we can follow the progress.
The system will get rebooted and once its back up we will be on 8.12.1
Here are a few additional blogs that might be useful post upgrade:
In this guide i will go over the steps of getting an existing 8.x VMware Aria Suite Lifecycle (formerly vRSLCM vRealize Lifecycle Manager) appliance to support the latest product releases available. Here is a great blog that goes in to the details about what the Product Support Pack is https://blogs.vmware.com/management/2019/01/vrslcm-pspak.html. Typically the newer Product Support Pack is included part of the upgrade for LCM, however sometimes there are product releases in between releases where product support packs come in handy.
The first step is to log in to vRealize Suite Lifecycle Manager under the Lifecycle Operations section
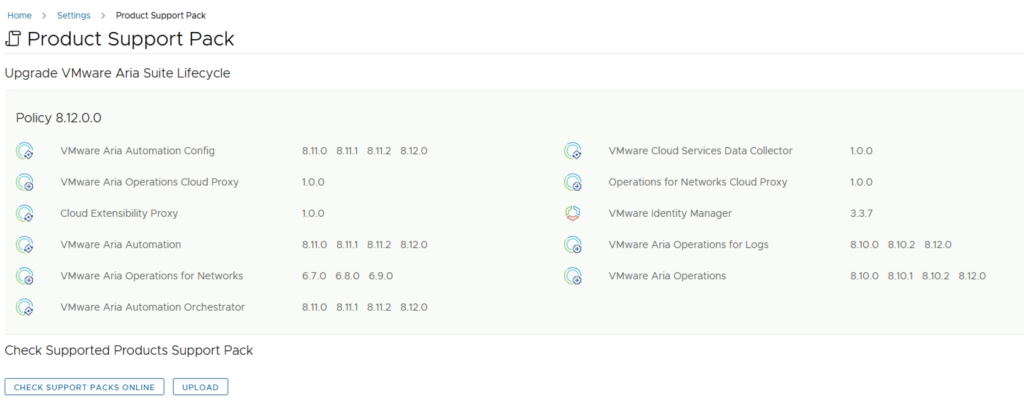
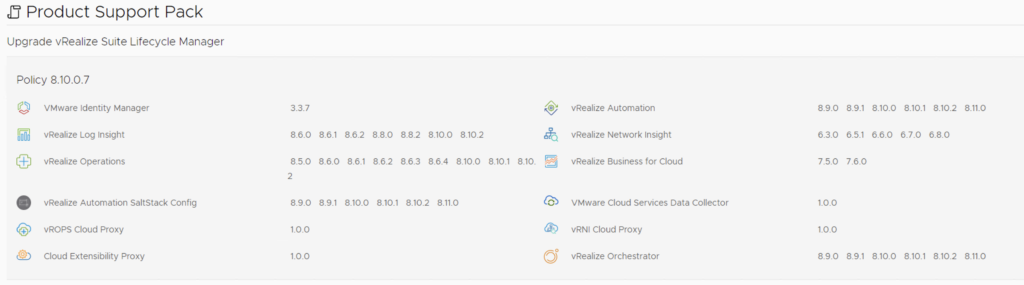
Go to settings -> Product Support Pack
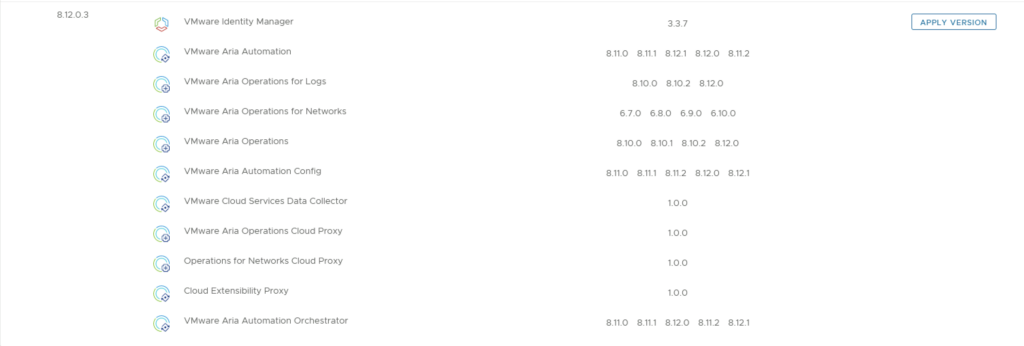
We can see that i recently upgraded to 8.12.0.0 however a new update is available 8.12.0.3. Based on what we can see in the details the new support pack adds support for vRA 8.12.1. If an update is not available click on the Check Support Packs Online button and refresh the screen within a few minutes
Click on Apply Version
Verify that a snapshot or a backup exists and click Submit
We can view the progress by clicking on the Click Here link after submitting the request
Once the process is complete the system will most likely reboot. To check the status we can go back to settings -> Product Support Pack. As we can see we are now at the updated patch level
If you get the below error clear the browser cache and try again
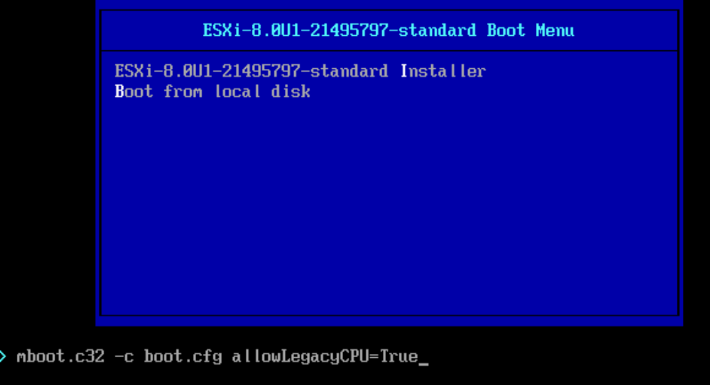
As i was installing\upgrading my lab environment to ESXi 7.0 i received an error that the CPU was unsupported. As per the release notes vSphere 8.0 release notes my CPU is no longer on the compatibility list.
Since this is a lab environment i wanted to continue using my current hardware. It goes without saying that this method should not be used in a production environment.
To allow the legacy CPU all I had to do is boot up from the ISO, on the boot Menu I pressed TAB or Shift + O and added allowLegacyCPU=True option as seen in the screenshot below
I was trying to find some documentation around the metrics monitored by the VMware Aria Operations Compliance Pack for HIPAA. Since VMware is now including the management pack as a native solution as of vRealize Operations 8.1 I wasn’t able to find allot of documentation around it so I exported the symptoms monitored.
Here is a list of the symptoms from version 8.10
HIPAA 164.312(c)(1) - Integrity - NTP time synchronization service is not configured on the host
HIPAA 164.312(a)(1) - Access Control - Count of maximum failed login attempts is nto set
HIPAA 164.312(c)(1) - Integrity - launchmenu feature is enabled
HIPAA 164.312(c)(1) - Integrity - Unity taskbar feature is enabled
HIPAA 164.312(c)(1) - Integrity - Shellaction is enabled
HIPAA 164.312(c)(1) - Integrity - Independent nonpersistent disks are being used
HIPAA 164.312(a)(1) - Access Control - Default setting for intra-VM TPS is incorrect
HIPAA 164.312(c)(1) - Integrity - NTP Server is not configured to startup with the host
HIPAA 164.312(a)(1) - Access Control - Dvfilter network APIs is nto configured to prevent unintended use
HIPAA 164.312(a)(1) - Access Control - HGFS file transfers are enabled
HIPAA 164.312(b) - Audit Control - Persistent logging is not configured for ESXi host
HIPAA 164.312(c)(1) - Integrity - Toprequest feature is enabled
HIPAA 164.312(b) - Audit Control - Remote logging for ESXi hosts is not configured
HIPAA 164.312(c)(1) - Integrity - PCI pass through device is configured on the virtual machine
HIPAA 164.312(c)(1) - Integrity - Bios Boot Specification feature is enabled
HIPAA 164.312(a)(1) - Access Control - Timeout to automatically terminate idle sessions is not configured
HIPAA 164.312(a)(1) - Access Control - Access to VM console is not controlled via VNC protocol
HIPAA 164.312(a)(1) - Access Control - VIX messages are enabled on the VM
HIPAA 164.312(c)(1) - Integrity - Protocolhandler feature is enabled
HIPAA 164.312(a)(1) - Access Control - Copy/paste operations are enabled
HIPAA 164.312(c)(1) - Integrity - Tray icon feature is enabled
HIPAA 164.312(a)(1) - Access Control - GUI Copy/paste operations are enabled
HIPAA 164.312(c)(1) - Integrity - version get feature is enabled
HIPAA 164.312(c)(1) - Integrity - Informational messages from the VM to the VMX file are not limited
HIPAA 164.312(a)(1) - Access Control - Timeout value for DCUI is not configured
HIPAA 164.312(a)(1) - Access Control - Guests can recieve host information
HIPAA 164.312(c)(1) - Integrity - Users and processes without privileges can remove, connect and modify devices
HIPAA 164.312(c)(1) - Integrity - NTP time synchronization server is not configured
HIPAA 164.312(c)(1) - Integrity - Unity active feature is enabled
HIPAA 164.312(c)(1) - Integrity - Autologon feature is enabled
HIPAA 164.312(a)(1) - Access Control - drag-n-drop - Copy/paste operations are enabled
HIPAA 164.312(c)(1) - Integrity - Intra VM Transparent Page Sharing is Enabled
HIPAA 164.312(c)(1) - Integrity - GetCreds feature is enabled
HIPAA 164.312(a)(1) - Access Control - Time after which a locked account is automatically unlocked is not configured
HIPAA 164.312(c)(1) - Integrity - Versionset feature is enabled
HIPAA 164.312(a)(1) - Access Control - Auto install of tools is enabled
HIPAA 164.312(a)(1) - Access Control - Access to DCUI is not set to allow trusted users to override lockdown mode
HIPAA 164.312(a)(1) - Access Control - Access to VMs are not controlled through dvfilter network APIs
HIPAA 164.312(a)(1) - Access Control - Copy/paste operations are enabled
HIPAA 164.312(a)(1) - Access Control - Managed Object Browser (MOB) is enabled
HIPAA 164.312(c)(1) - Integrity - Trash folder state is enabled
HIPAA 164.312(c)(1) - Integrity - Unity feature is enabled
HIPAA 164.312(a)(1) - Access Control - Timeout is not set for the ESXi Shell and SSH services
HIPAA 164.312(c)(1) - Integrity - Image Profile and VIB Acceptance Levels are not configured to desired level
HIPAA 164.312(c)(1) - Integrity - Firewall is not configured for NTP service
HIPAA 164.312(c)(1) - Integrity - Unity push feature is enabled
HIPAA 164.312(c)(1) - Integrity - Users and processes without privileges can connect devices
HIPAA 164.312(c)(1) - Integrity - Memsfss feature is enabled
HIPAA 164.312(c)(1) - Integrity - Unity Interlock is enabled
HIPAA 164.312(c)(1) - Integrity - Unity window contents is enabled
HIPAA 164.312(e)(1) - Transmission Security - NFC on the vCenter is not configured for SSL
HIPAA 164.312(e)(1) - Transmission Security - Restrict port-level configuration overrides on VDS
HIPAA 164.312(c)(1) - Integrity - Virtual disk shrinking wiper is enabled
HIPAA 164.312(c)(1) - Integrity - Virtual disk shrinking is enabled
HIPAA 164.312(e)(1) - Transmission Security - The Forged Transmits policy is not set to reject
HIPAA 164.312(e)(1) - Transmission Security - MAC Address Changes policy is set to reject
HIPAA 164.312(e)(1) - Transmission Security - SNMP Server is running on the host
HIPAA 164.312(e)(1) - Transmission Security - The Promiscuous Mode policy is not set to reject
HIPAA 164.312(d) - Person or Entity Authentication - Active directory is not used for local user authentication
HIPAA 164.312(e)(1) - Transmission Security - Host firewall is not configured to restrict access
HIPAA 164.312(e)(1) - Transmission Security - BPDU filter is not enabled on the host
HIPAA 164.312(e)(1) - Transmission Security - The MAC Address Changes policy is not set to reject
HIPAA 164.312(d) - Person or Entity Authentication - Password policy for password complexity is not set
HIPAA 164.312(e)(1) - Transmission Security - VDS network healthcheck for Teaming Health Check is enabled
HIPAA 164.312(d) - Person or Entity Authentication - Bidirection CHAP auhtentication is not enabled
HIPAA 164.312(e)(1) - Transmission Security - Forged Transmits policy is set to reject
HIPAA 164.312(e)(1) - Transmission Security - Promiscuous Mode policy is configured to reject
SaltStack Config and Ansible Tower are two powerful configuration management and infrastructure automation tools that cater to the needs of DevOps teams across the globe. While SaltStack Config is an open-source solution, Ansible Tower is the commercial, enterprise-ready version of Ansible Open Source. In this blog post, we will compare SaltStack Config and Ansible Tower in terms of architecture, ease of use, scalability, and features to help you make an informed decision on which tool is best suited for your requirements.
Architecture:
SaltStack Config: SaltStack Config employs a master-minion architecture, where a central master server controls multiple minion nodes. This structure enables powerful parallel processing, as the master server can send commands to all connected minions simultaneously. SaltStack uses a ZeroMQ-based messaging protocol for communication between the master and minions, ensuring better performance and lower latency compared to SSH-based solutions.
Ansible Tower: Ansible Tower is built on top of the open-source Ansible project and retains its agentless architecture, where all operations are executed on target nodes via SSH (or WinRM for Windows hosts). However, Ansible Tower adds a powerful web-based user interface, role-based access control, and centralized management capabilities to the core Ansible features.
Ease of Use:
SaltStack Config: SaltStack Config utilizes YAML-based configuration files called “states” to define the desired configuration of a system. The tool uses Jinja2 templating, allowing for dynamic configuration generation and flexibility in managing complex environments. SaltStack Config also offers a secure data management system called “Pillar” for storing and handling sensitive data.
Ansible Tower: Ansible Tower provides a user-friendly web interface, making it easier for teams to manage their infrastructure without requiring deep knowledge of the underlying Ansible Open Source technology. Like SaltStack Config, Ansible Tower also uses YAML-based configuration files (playbooks) and supports Jinja2 templating.
Scalability:
SaltStack Config: The master-minion architecture of SaltStack Config allows it to handle thousands of nodes efficiently, making it a popular choice for large-scale deployments. While a single master server can become a bottleneck in very large environments, this issue can be mitigated using techniques like multi-master setups or syndics.
Ansible Tower: Ansible Tower enhances the scalability of Ansible Open Source through features like clustering, which allows multiple Tower instances to work together to manage large-scale infrastructures. While the underlying agentless architecture still presents some scalability challenges, Ansible Tower addresses them to a significant extent with enterprise-grade features.
Features:
SaltStack Config: SaltStack Config offers powerful features like parallel execution, event-driven automation, and remote execution, making it a versatile and efficient choice for configuration management and infrastructure automation. Additionally, the tool provides extensive support for cloud platforms, container management, and network automation.
Ansible Tower: Ansible Tower builds upon the core features of Ansible Open Source and adds enterprise-ready capabilities like a web-based user interface, role-based access control, job scheduling, and centralized logging and auditing. The tool also provides integration with popular third-party services and supports a wide range of plugins and modules.
Conclusion:
Both SaltStack Config and Ansible Tower are powerful and feature-rich configuration management and infrastructure automation tools. SaltStack Config stands out with its master-minion architecture and superior scalability, making it well-suited for large-scale deployments. On the other hand, Ansible Tower offers a user-friendly web interface and enterprise-grade features, catering to organizations that require a more streamlined and centralized solution. The choice between the two tools depends on your specific requirements, infrastructure size, and the level of complexity you need to manage. Evaluating both tools within the context