Browse Author

Cosmin Trif

Benefits of Using vROps Workload Optimizations Over Regular DRS

VMware vRealize Operations (vROps) is a comprehensive solution for managing the performance and capacity of virtual environments. It offers several workload optimizations to help administrators balance resource utilization, meet SLAs, and ensure optimal performance. These optimizations go beyond what is possible with traditional Distributed Resource Scheduler (DRS) and can provide numerous benefits to organizations. In this blog, we will explore some of the advantages of using vROps workload optimizations over regular DRS.

  1. Advanced Performance Analytics vROps provides real-time performance analytics and capacity planning, which helps administrators make informed decisions about resource allocation. This can result in improved application performance and reduced downtime. vROps also provides detailed performance metrics for individual virtual machines and infrastructure components, making it easier to identify performance bottlenecks.
  2. Customized Workload Optimizations vROps provides workload optimizations that can be customized to meet the specific needs of an organization. This allows administrators to fine-tune resource utilization and balance performance and cost efficiency. With vROps, administrators can set custom policies to manage resource allocation, prioritize critical applications, and enforce SLAs.
  3. Improved Visibility vROps provides a unified view of the virtual environment, making it easier to manage and monitor resource utilization. This improved visibility helps administrators to quickly identify and resolve performance issues, improving the overall health of the virtual environment. vROps also provides real-time alerts, which can help administrators to quickly respond to critical issues before they become major problems.
  4. Cost Savings vROps provides several optimizations to help organizations save on costs. For example, vROps can help administrators to optimize resource utilization and reduce unnecessary overprovisioning. Additionally, vROps can help organizations to avoid licensing costs by providing detailed information on virtual machine usage, making it easier to determine which virtual machines can be decommissioned or consolidated.

In conclusion, vROps workload optimizations provide organizations with several benefits that go beyond what is possible with traditional DRS. With advanced performance analytics, customized workload optimizations, improved visibility, and cost savings, vROps provides a comprehensive solution for managing virtual environments. By using vROps, organizations can improve application performance, reduce downtime, and ensure optimal resource utilization.

Upgrading vIDM (VMware Identity Manager ) to 3.3.7 via vRSLCM

In this post i will go over upgrading my 3.3.6 vIDM appliance to 3.3.7 using vRSLCM (vRealize Suite Lifecycle Manager). If you want to upgrade to LCM 8.10 instructions can be found here. The upgrade does not include the latest PSPACK that contains the 3.3.7 vIDM release. Instructions to get the PSPACK can be found on my other blog post here.

To get started we can go to vRealize Lifecycle Manager -> Lifecycle Operations -> Settings -> Binary Mapping. (If you haven’t added your My VMware credentials you will need to do that first by going to vRealize Lifecycle Manager -> Lifecycle Operations -> Settings -> My VMware)

Click on Add Binaries under Product Binaries

Select My VMware and click on Discover

We can see a list of binaries that have been discovered. Make sure we select the upgrade package not the install package. We can select what we need and click on Add

This will create a request and start downloading the package. To view the progress we can click on the Click Here hyperlink

Click on the in Progress button to view the details

We now have to wait for the download to complete

After the download is complete we can go to Environments -> View Details on the environment that includes vIDM

Click on Upgrade

An Inventory sync is required when performing vIDM upgrades. We trigger the sync from the UI and click on Proceed once completed to continue

Select product Version 3.3.7 and click Next. We can also review the compatibility matrix to make sure the environment is compatible.

A new feature that was added was the capability to automatically create a snapshot prior to the upgrade and remove it after the upgrade. On this screen we also have the ability to chose if we want to keep the snapshots post upgrade for validation testing for example. Click next

Run the Precheck to make sure there are no errors or issues.

There`s a list of Manual Validations. Once verified click on I took care of the manual steps above and am ready to proceed check box and click on Run Precheck

Once the check is complete we can review the checks that were performed and we can continue by clicking Next.

Review the upgrade details and click on Submit. We are then taken to the progress screen where we can follow the progress.

The system will get rebooted and once its back up we will be on 3.3.7

Since we are doing a major upgrade i strongly recommend to clean the cache before using the new vIDM version.

Deploying vRA 8.11 using the Easy Installer

In this guide i will go over the deployment of vRA 8.11 using the Easy Installer. The reason i like the Easy Installer is because it deploys everything that i need. vIDM, Lifecycle Manager as well as vRA.

To get started we need to download the installer from here.

Once downloaded mount the iso as a drive using your favorite tool or extract it as a archive using something like 7-zip

Once mounted go to the CDROM in the vrlcm-ui-installer\Mac directory if on mac or vrlcm-ui-installer\win32 if you are on windows. In here run the installer file

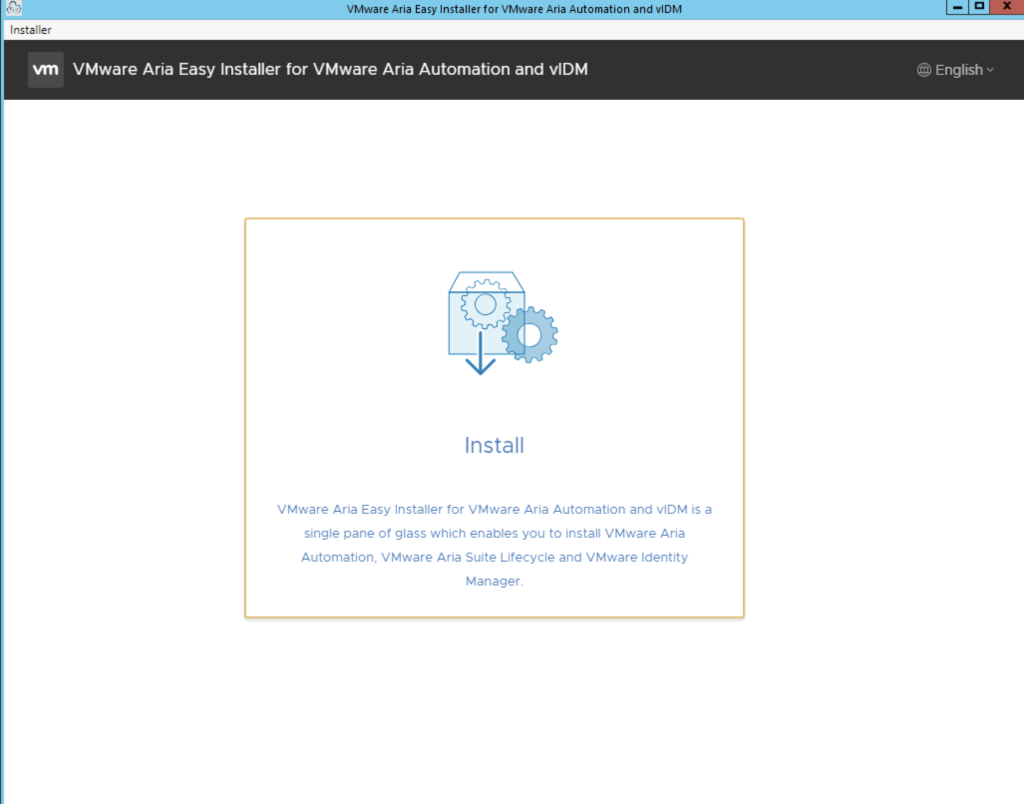
We will be presented with the following window:

The migration option allows us to migrate from from vRSLCM 2.1 to 8.x, it can migrate Datacenter and vCenters, all existing environments, DNS, SNMP, NTP, My VMware, proxy details, migration of vIDM installation as well as Blackstone Content endpoints. For the purpose of this guide we will process with the Install option

Once we click Install we will be presented with an Introduction of what components will be included part on the installation. In my case i can see vRealize Automation 8.11, Lifecycle Manager 8.10, Identity Manager 3.3.6.

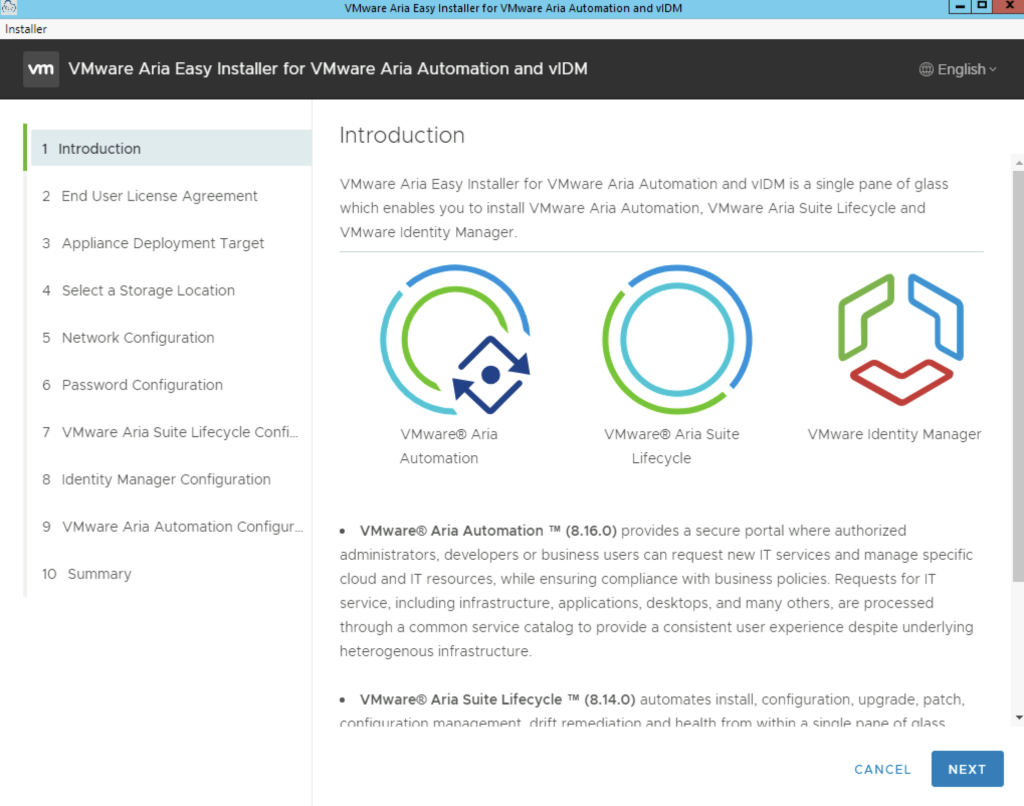
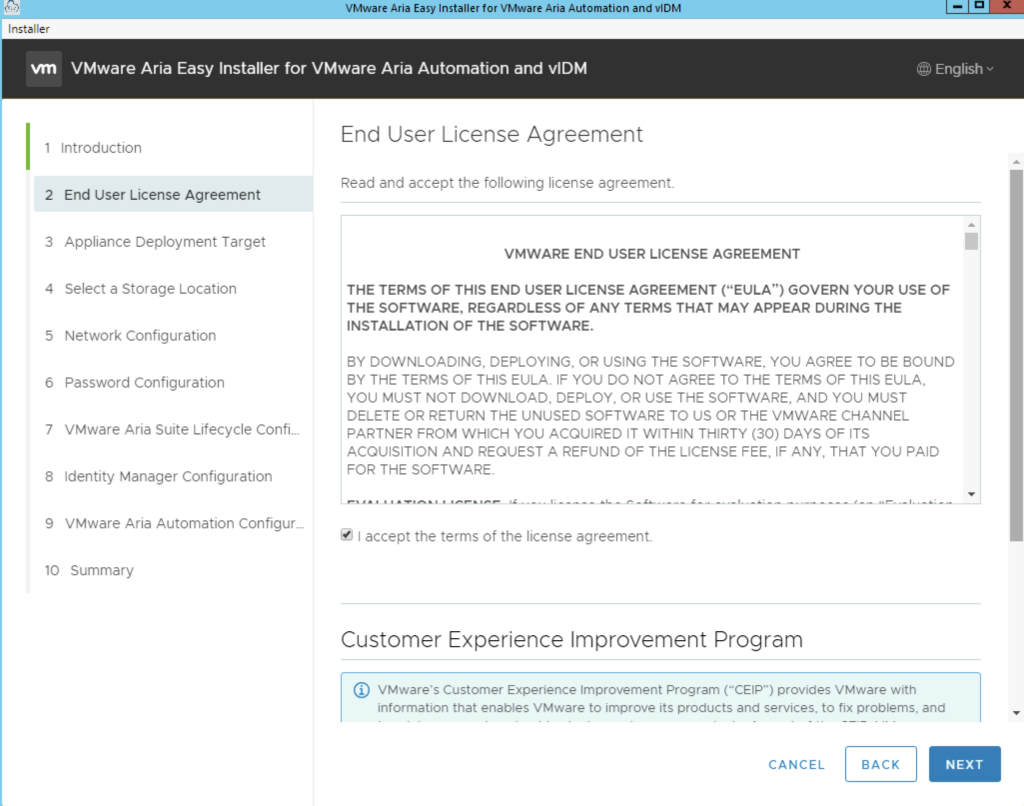
Click Next, Review, accept the agreement and click next

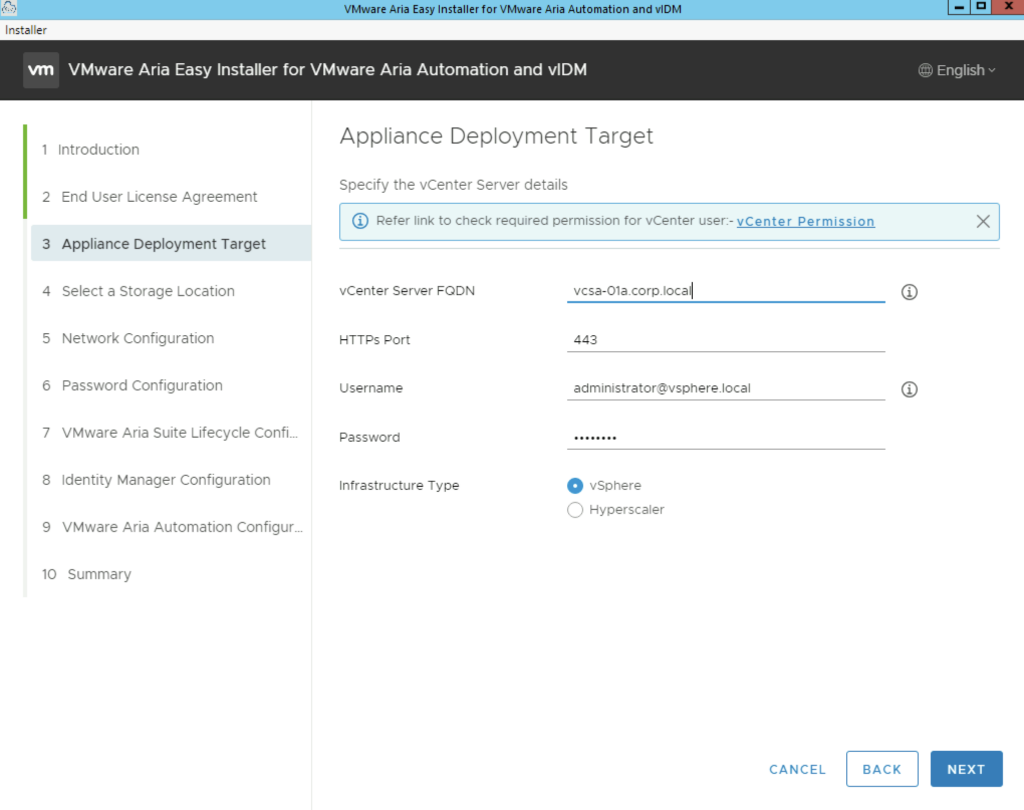
Provide the vCenter details and click next. In my case i used the administrator account. A detailed list of permissions needed for deployment can be found here

Sections 4, 5, 6 and 7 are straight forward so i will skip them

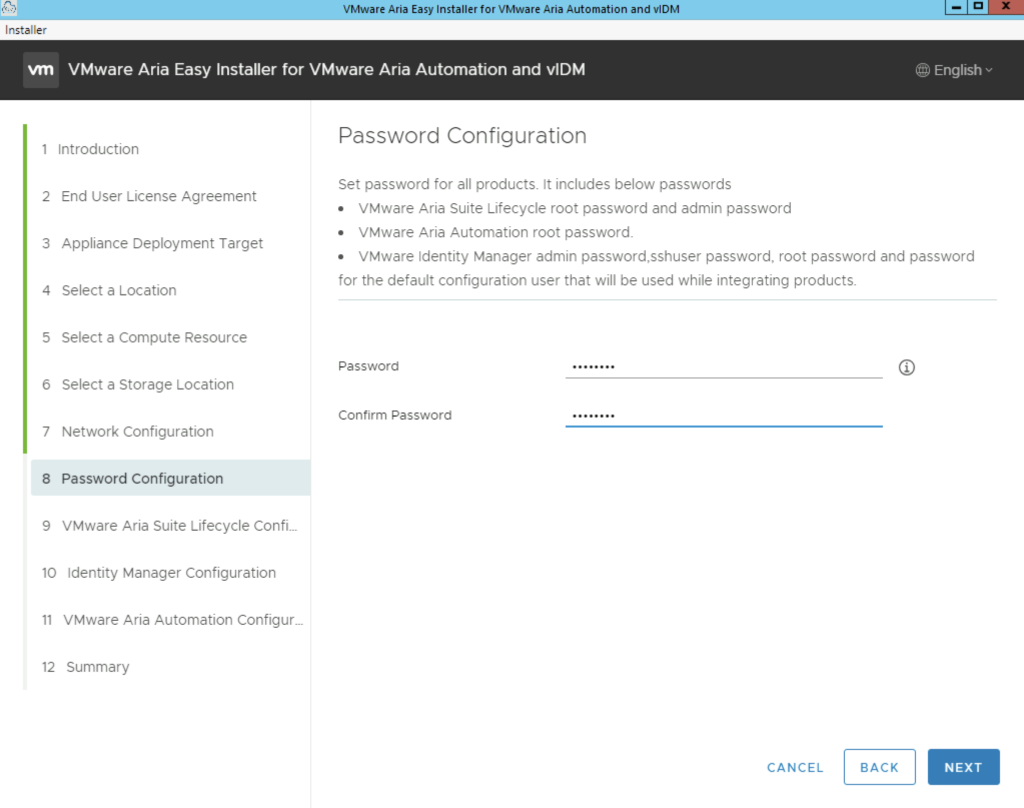
In section 8 select a password that will be used across all products for the local usernames. ex for LCM root and local admin, vIDM admin, sshuser, root etc

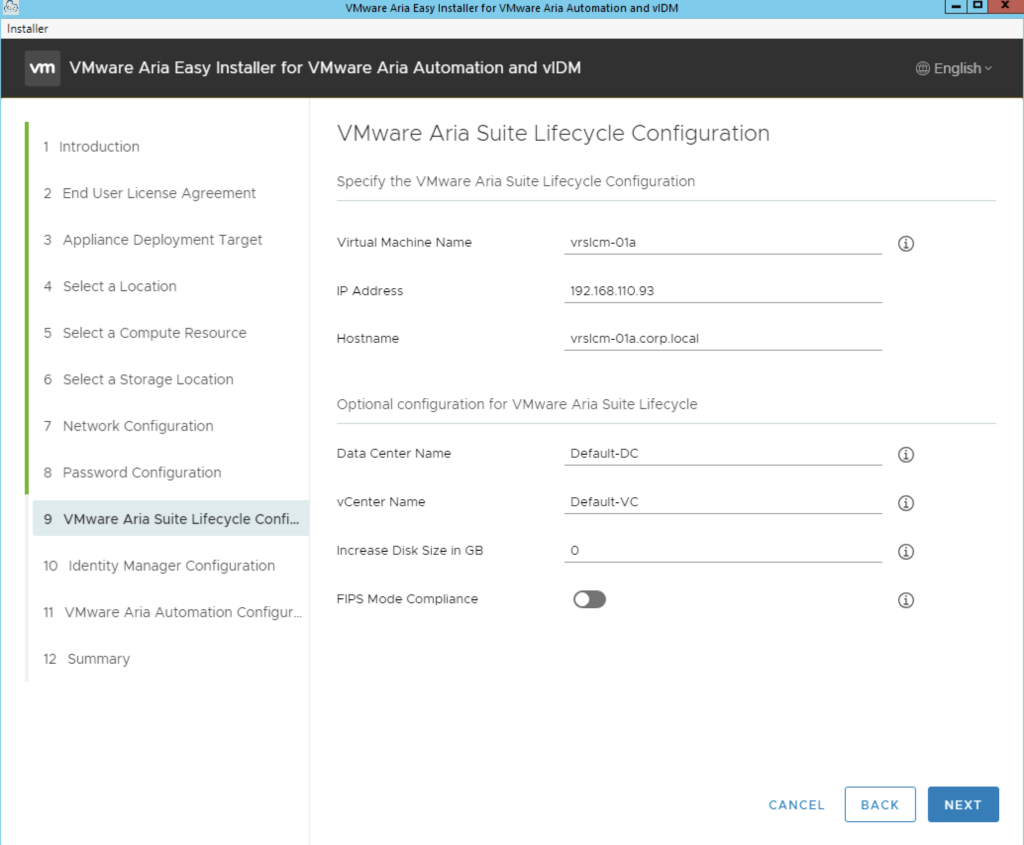
Select a VM name for the Lifecycle Manager appliance and its ip credentials. If you are expecting a large repository in lifecycle manager we can add additional disk under the Increase Disk Size in GB section.

The FIPS Mode compliance option enforces FIPS compliance, however keep in mind that with the FIPS mode enabled there are limitation on what the product can do. This can be disabled later and re enabled as needed.

Complete the fields and click next

The next portion is vIDM. In case there is an existing vIDM appliance in the environment we can also import and existing vIDM appliance. In my case i will deploy a new one.

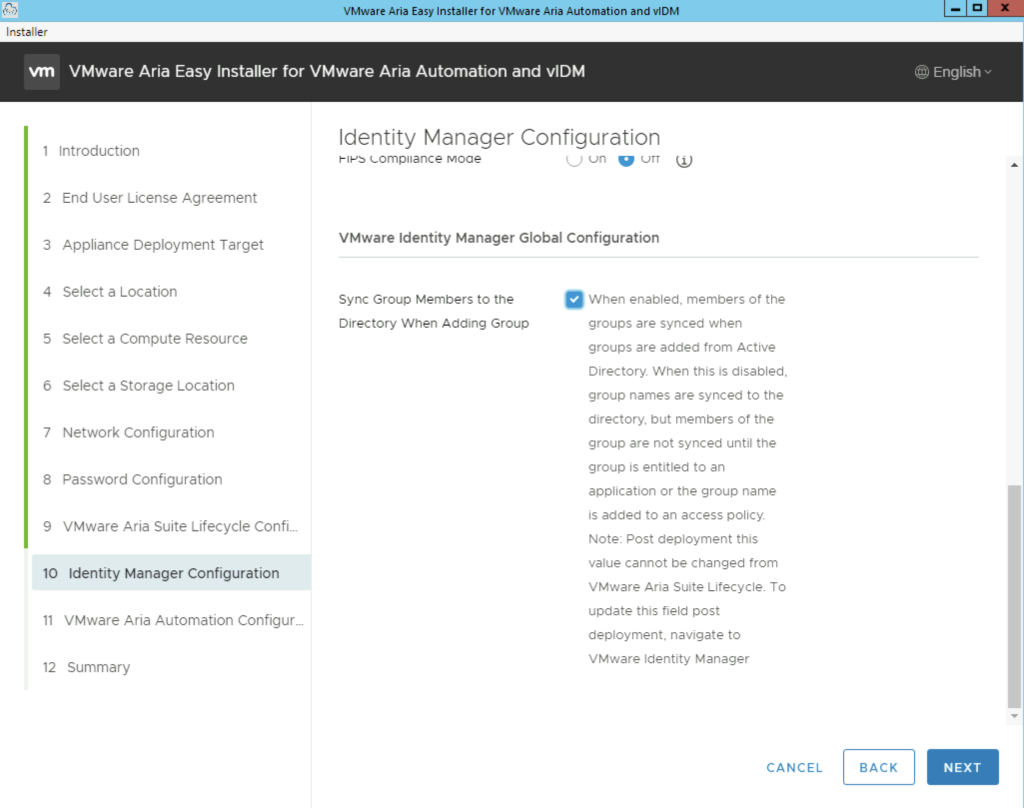
One important option under vIDM is the Sync Group Members to the Directory When Adding Group. When enabled, members of the groups are synced when groups are added from Active Directory. When this is disabled, group names are synced to the directory, but members of the group are not synced until the group is entitled to an application or the group name is added to an access policy. Note: Post deployment this value cannot be changed from vRealize Suite Lifecycle Manager. To update this field post deployment, navigate to VMware Identity Manager

My configuration page looks like this:

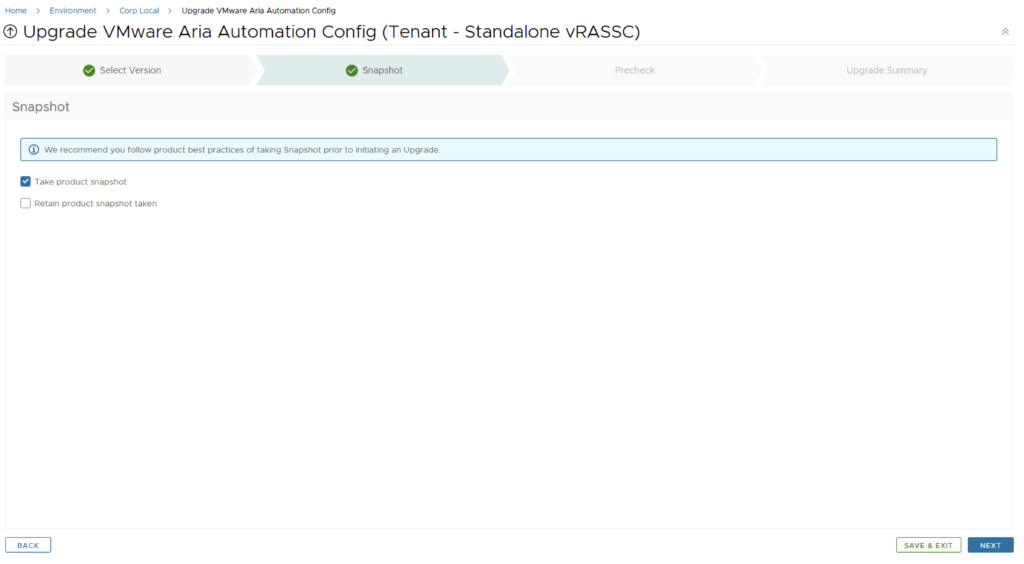
The next section is the vRA Configuration. In here we have a couple of options. We can perform a standard 1 node deployment or a cluster deployment which includes 3 appliances. The FIPS Compliance mode enables FIPS compliance. Unlike LCM this mode cannot be disabled after the deployment. This disables a number of options in vRA from an LCM perspective. Please make sure that its only enabled if required.

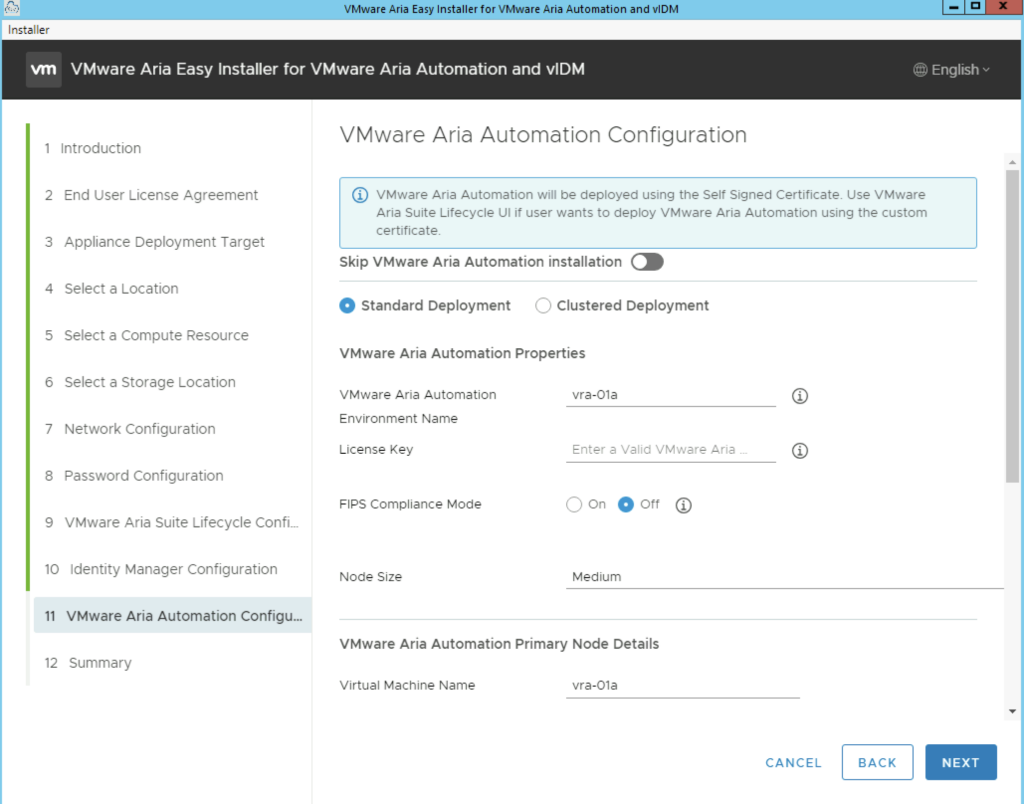
The advanced configuration at the bottom of the page includes the option to change the internal Kubernetes cluster and Service ip range. This is useful if the default range is already in use on the internal network. We want to make sure we pick an ip range thats not used somewhere else in order to avoid routing issues. Once complete click next

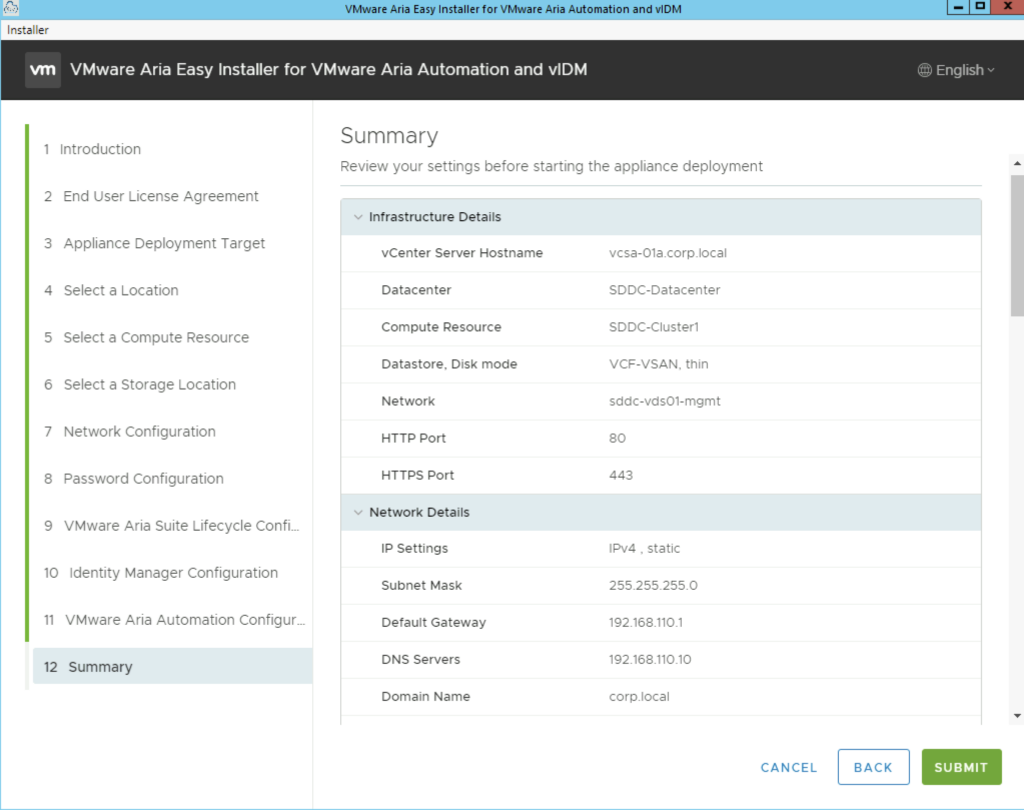
The next page gives us a summary of our deployment and we can click submit to start the deployment.

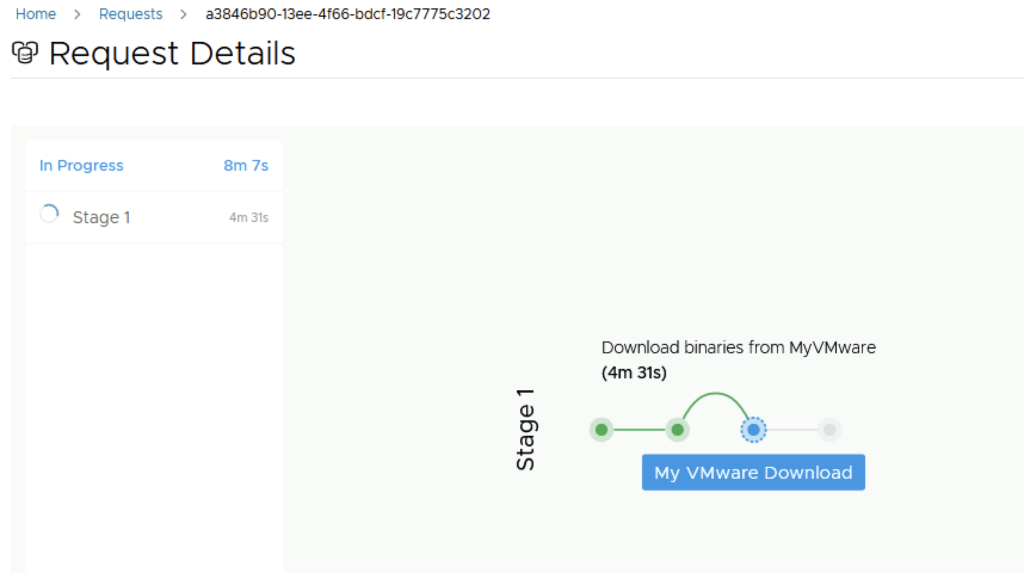
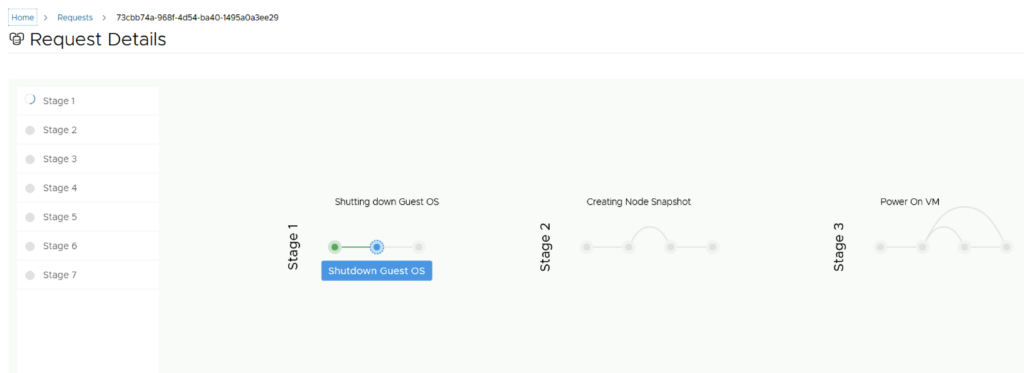
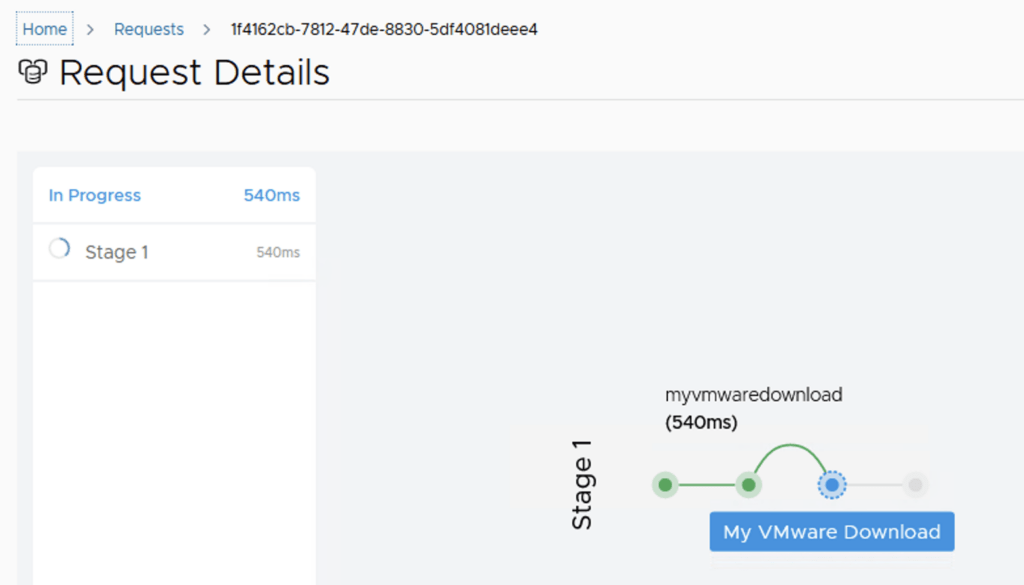
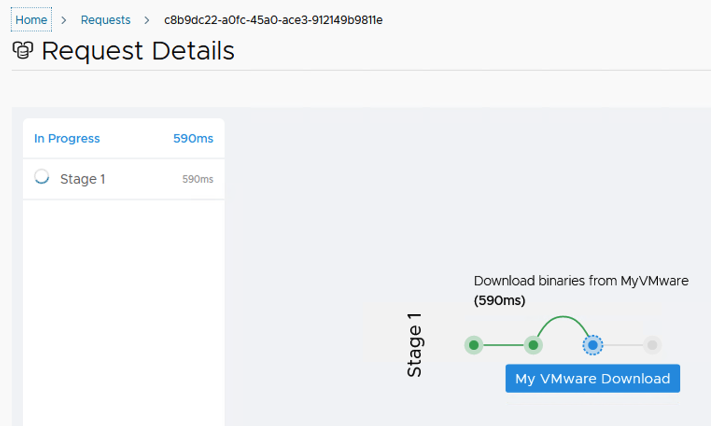
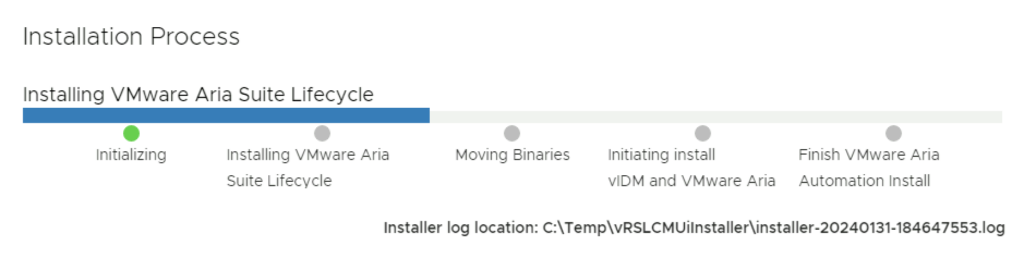
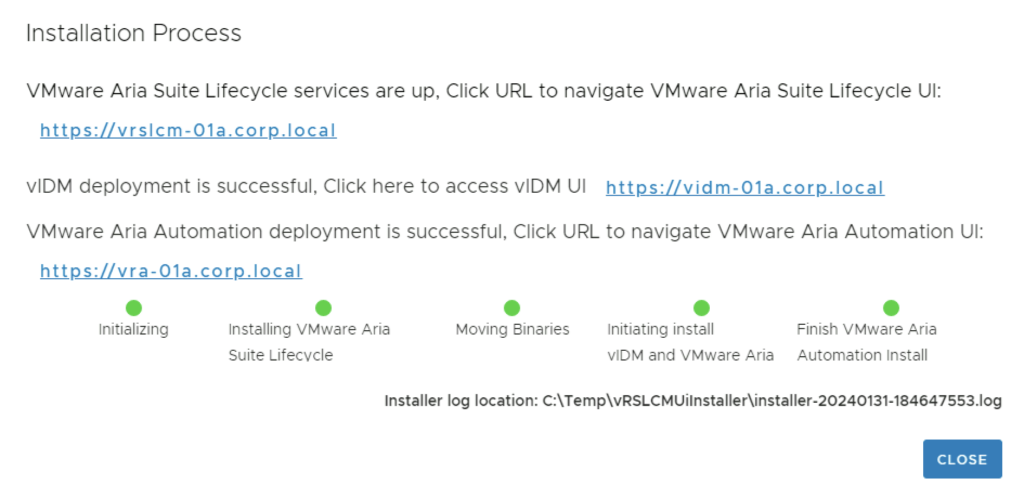
Next we are presented with the installation process. We can follow it along, in my environment the full deployment took about 1.5 hrs

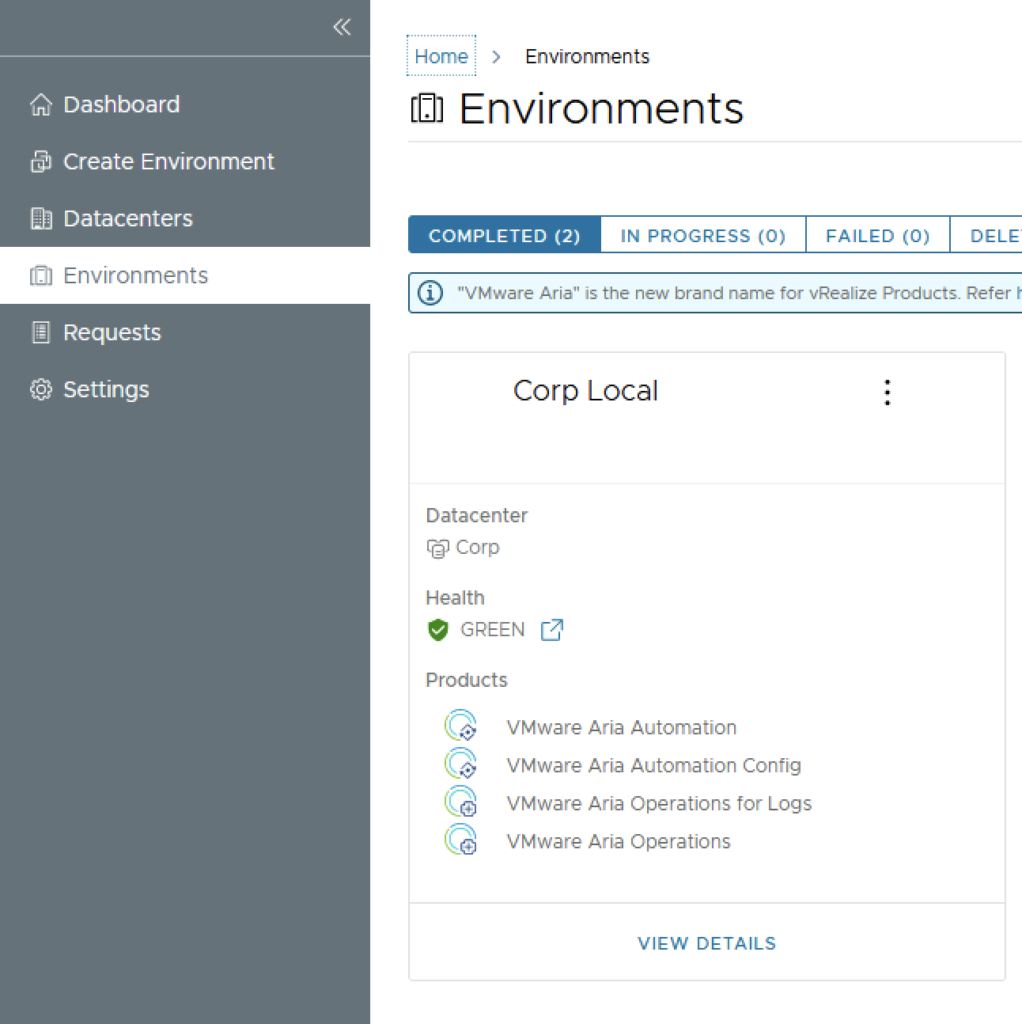
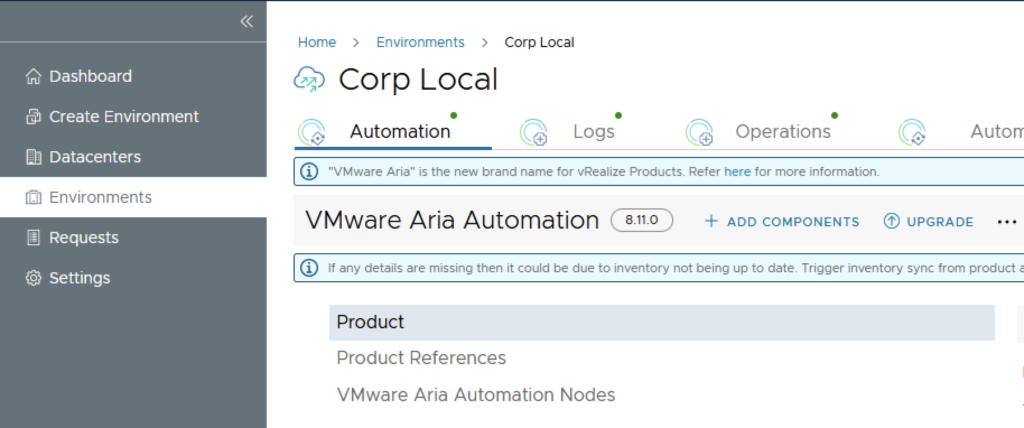
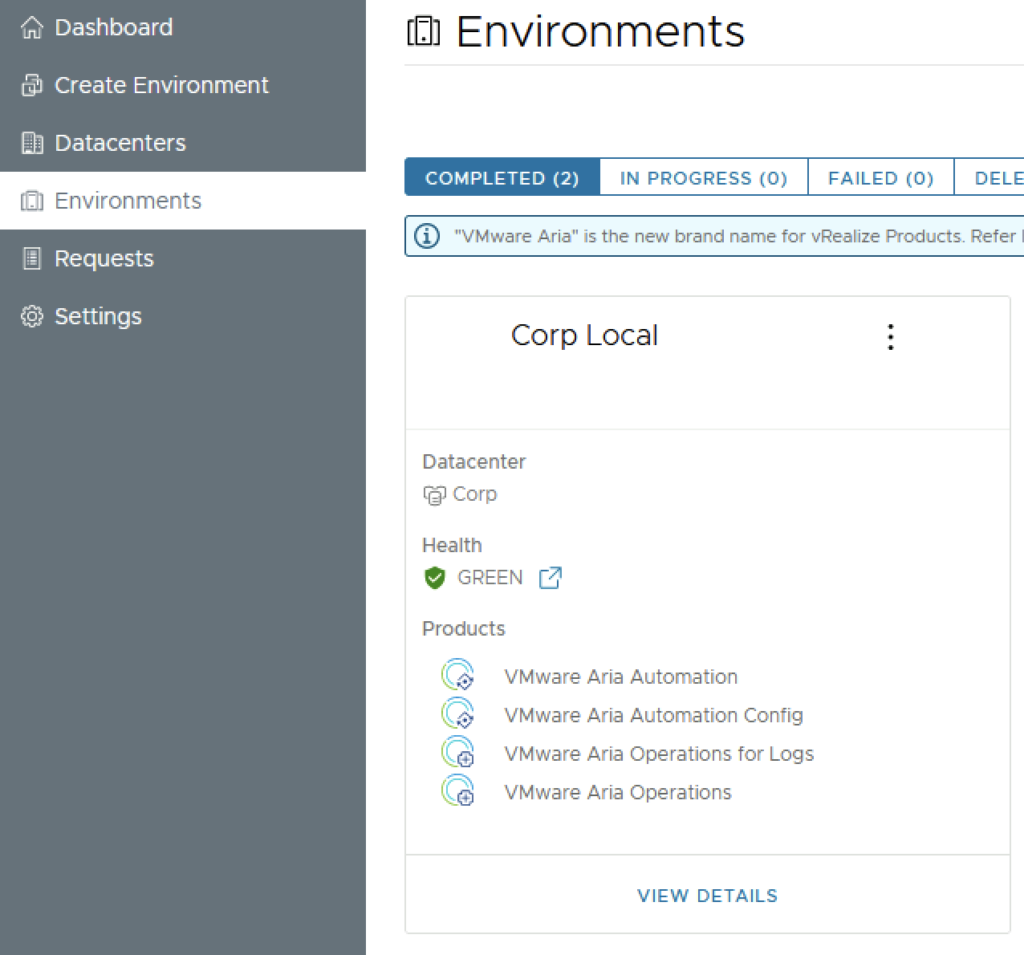
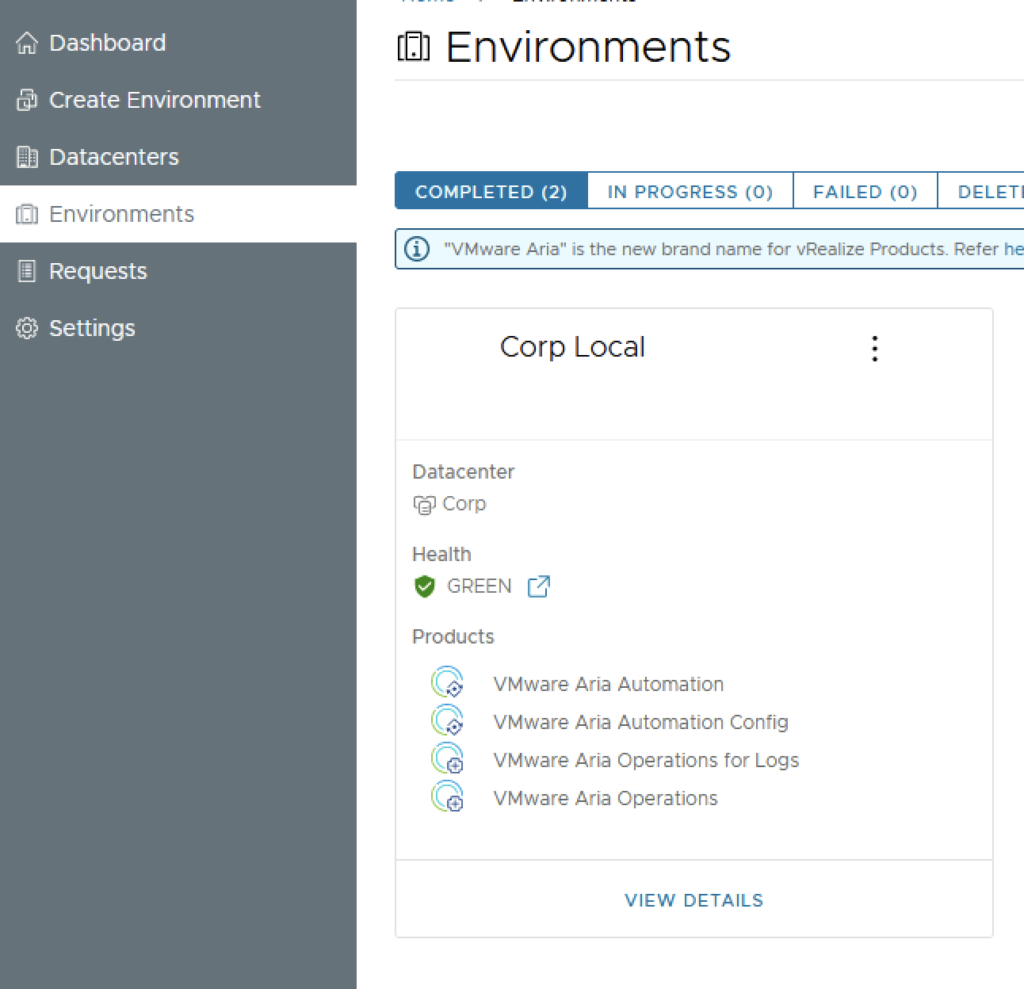
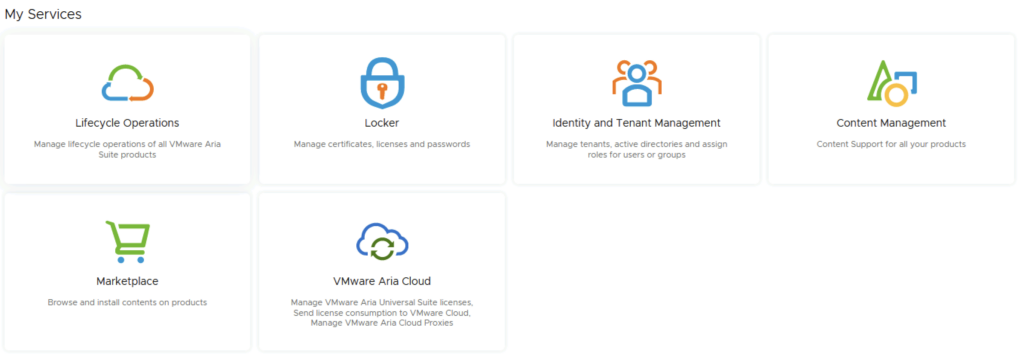
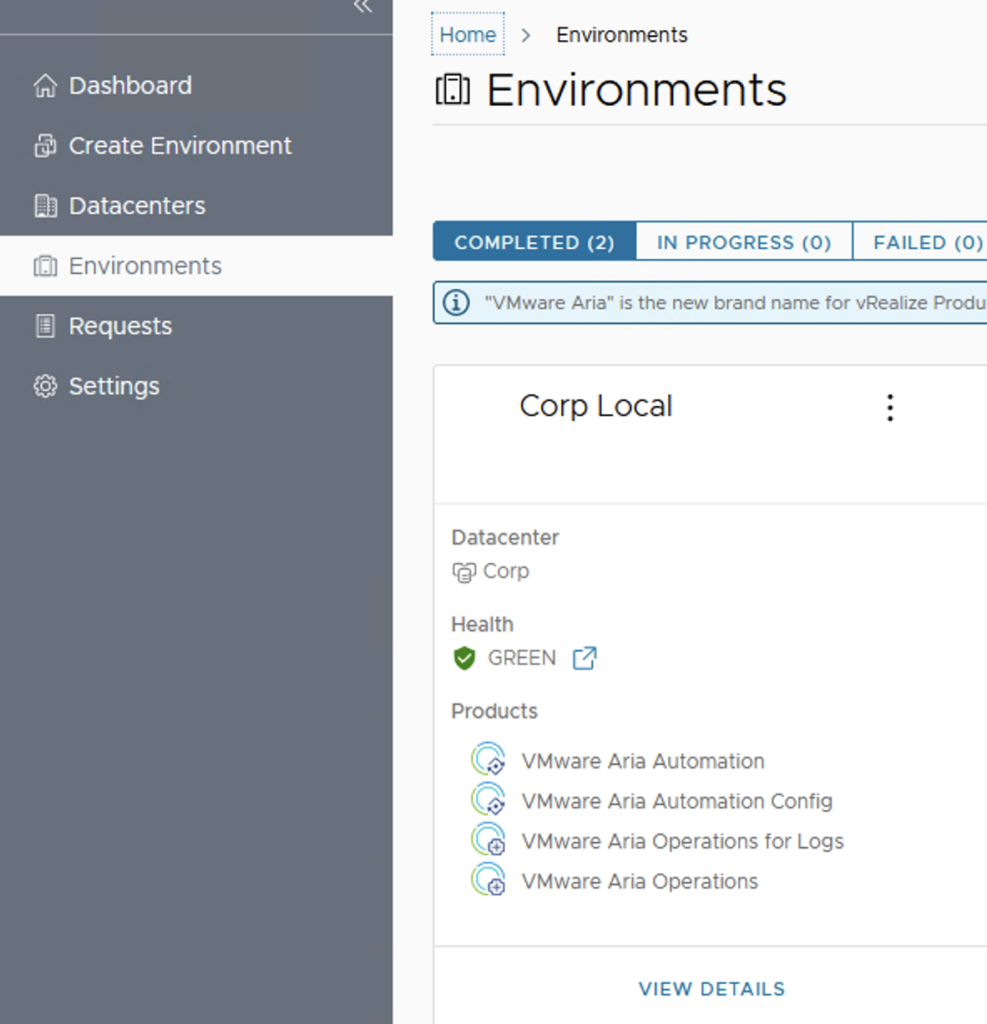
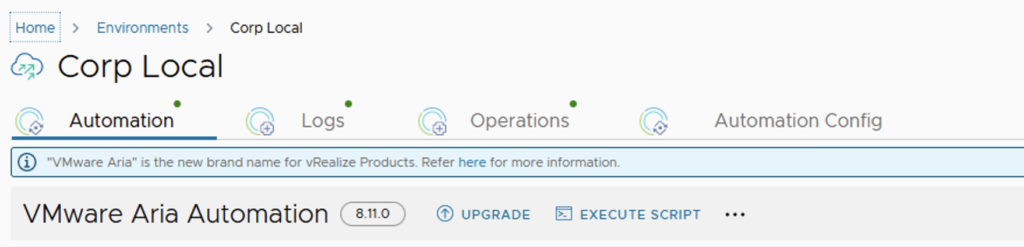
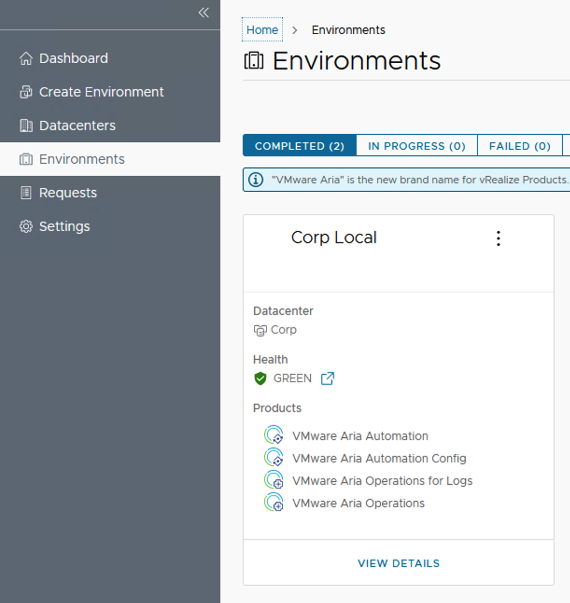
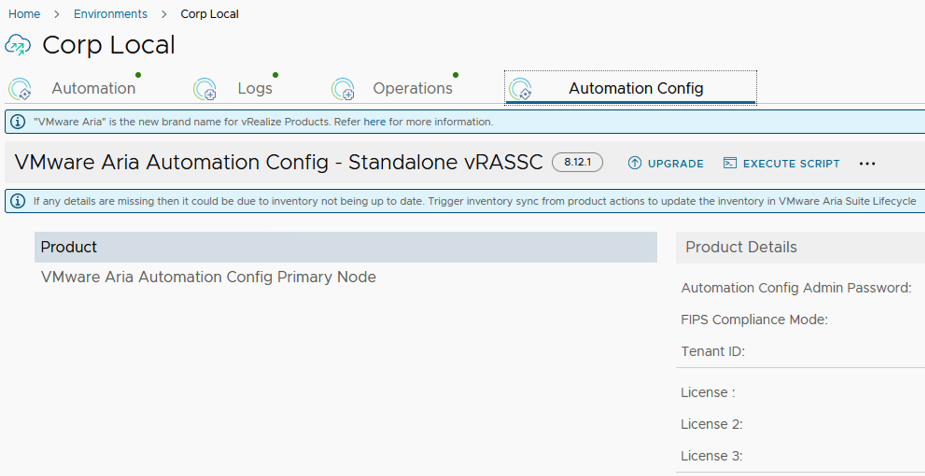
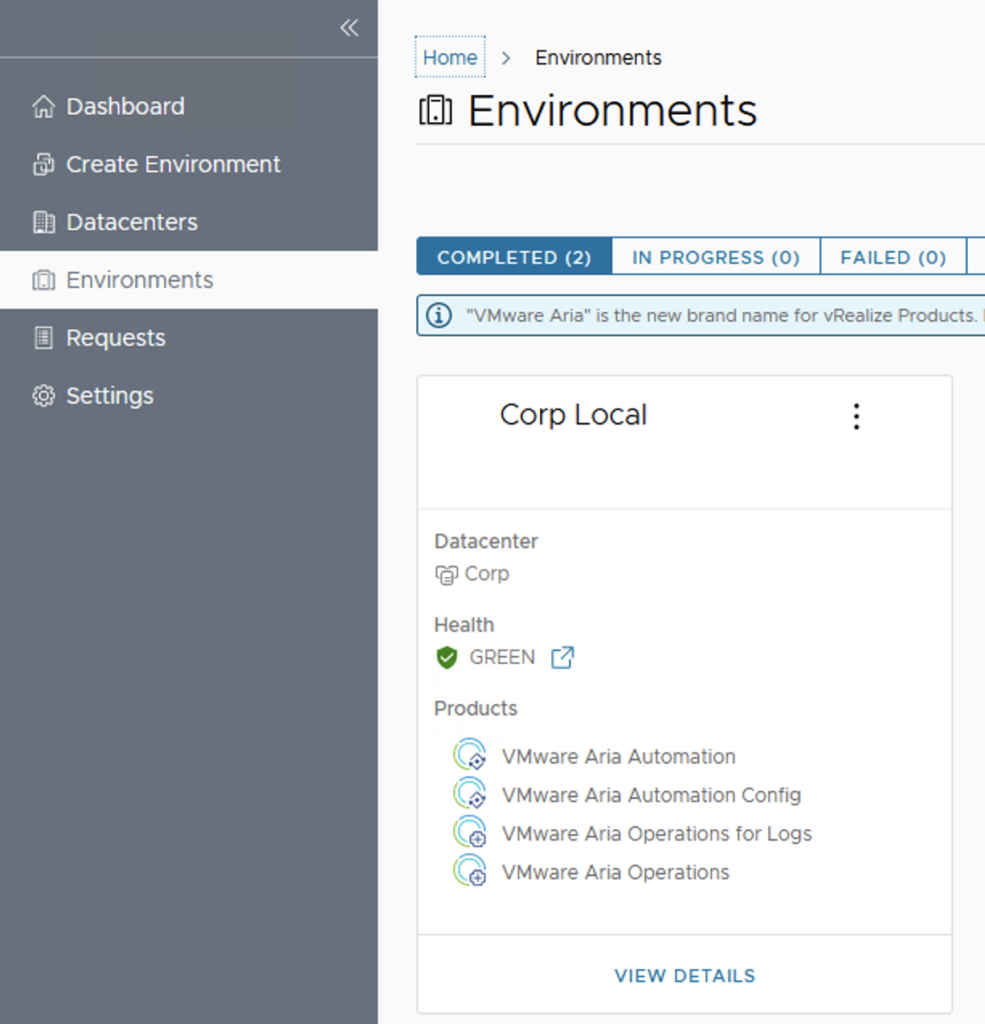
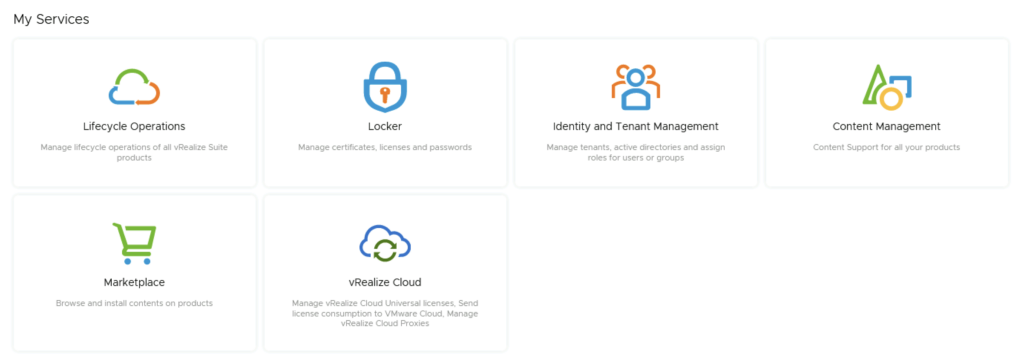
After the install is complete we are presented to links for the different services

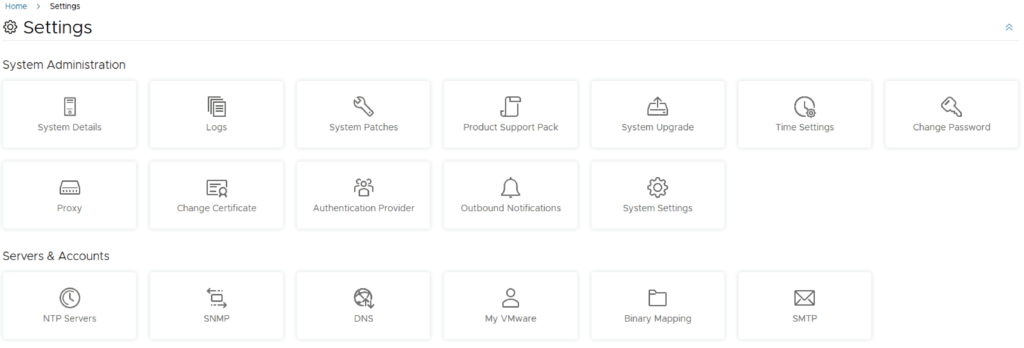
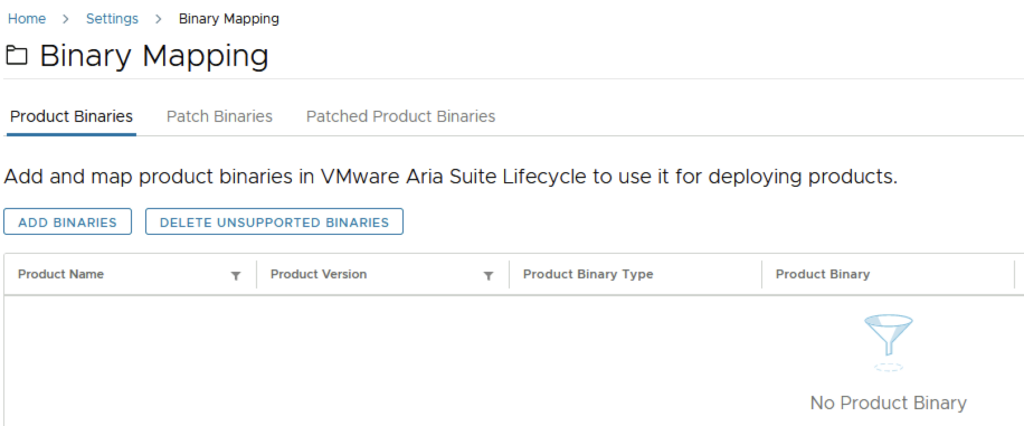
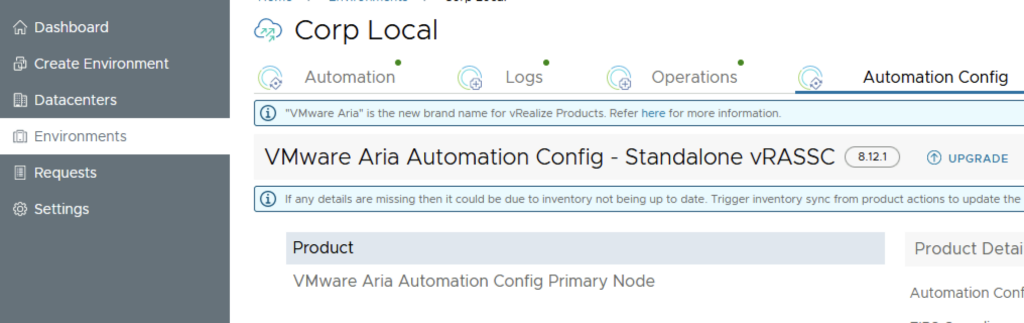
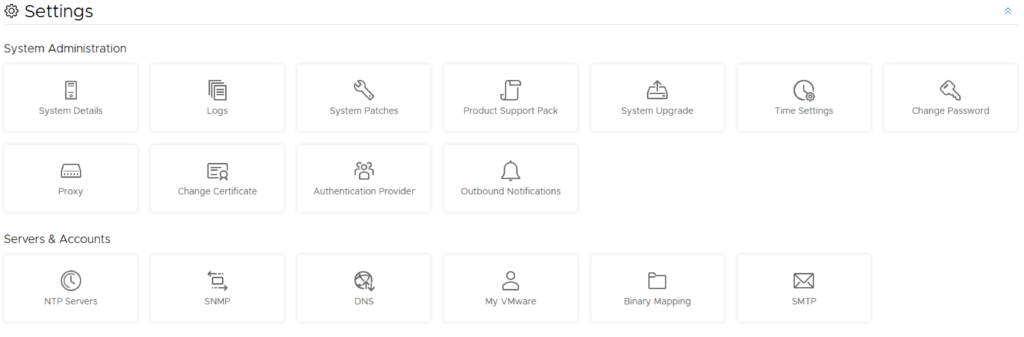
Next i would recommend LCM certificate management found here

vRSLCM (vRealize Lifecycle Manager) Product Support Pack

In this guide i will go over the steps of getting an existing 8.x vRSLCM appliance to support the latest product releases available. Here is a great blog that goes in to the details about what the Product Support Pack is https://blogs.vmware.com/management/2019/01/vrslcm-pspak.html. Typically the newer Product Support Pack is included part of the upgrade for LCM, however sometimes there are product releases in between releases where product support packs come in handy.

The first step is to log in to vRealize Suite Lifecycle Manager under the Lifecycle Operations section

Go to settings -> Product Support Pack

We can see that i recently upgraded to 8.10.0.0 however a new update is available 8.10.0.7. Based on what we can see in the details the new support pack adds support for vRA 8.11. If an update is not available click on the Check Support Packs Online button and refresh the screen within a few minutes

Click on Apply Version

Verify that a snapshot or a backup exists and click Submit

We can view the progress by clicking on the Click Here link after submitting the request

Once the process is complete the system will most likely reboot. To check the status we can go back to settings -> Product Support Pack. As we can see we are now at the updated patch level

If you get the below error clear the browser cache and try again

Upgrading VCF 4.4.0 to 4.5 Step by Step

With the release of of VCF 4.5 i wanted to get my lab upgraded. The release blog can be found here and the release notes are here

Please note that some of the components within the VCF will still need additional upgrading. Please read the release notes for additional details.

We can start by going to Lifecycle Management -> Bundle management -> Download now. If you do not see the newest releases go to Administration -> Repository settings and add a VMware Customer Connect account that has access to perform downloads.

We can also download it directly from the domain by going to Inventory -> Workload Domains -> Select the domain -> Update/Patches -> Select the VCF version -> Download now

Next we need to download the configuration drift bundle by going to Lifecycle Management -> Bundle Management -> Download now

Alternatively it can also be downloaded directly under the Workload domain Inventory -> Workload Domains -> Select Workload domain -> Updates/Patches -> Select the cloud foundation version and click on Download now

The next step is to upgrade VCF by going to Inventory -> Workload Domains -> Select the workload domain -> Update/Patches -> Select the cloud foundation version we’re upgrading to and click on Update Now for the VMware Cloud Foundation Update 4.5. This will install both the Cloud Foundation update as well as the drift remediation

Next we are taken to the Upgrade page where we can follow the upgrade for each one of the components

Once the upgrade is complete we can click Finish to be returned back to the main screen

Because we are changing the SDDC-Manager versions i would strongly recommend to clear cache and log back in before going forward.

Next step is to upgrade NSX-T installation to NSX-T 3.2.1. The release notes can be found here. We can go to Lifecycle Management -> Bundle Management -> Download now. The 4.5 release actually comes with NSX-T 3.1.3, however because I haven’t upgraded my environment yet, I need to get to 3.1.2 first. The 3.1.3 release notes can be found here and the process is the same.

We can also download it directly from the workload domain by going to Inventory -> Workload Domains -> Select the domain -> Update/Patches -> Select the VCF version -> Download now

Once the download is complete we can proceed with updating the NSX components by clicking on the update now

Make the proper selection and click next

Make the proper selection and click next

Make the proper selection and click next

Review the options and click on Finish

The upgrade will go thought upgrading the NSX edges. We can view the upgrade status by clicking on view status

Once the edges are upgraded we an go back to Inventory -> Workload Domains -> Select the workload domain -> Update/Patches -> Under Available updates click on Update Now

Review the selection and click next

Review the host clusters and click next

Review the upgrade options and click next

Review the selection and click finish

We can view the status of the upgrade by selection view status

Once the upgrade is complete we can proceed with the vCenter Upgrade. VCF 4.5 comes with vCenter Server 7.0 Updated 3h. The release notes can be found here. We can go to inventory -> Workload Domains -> Select the workload domain -> Update/Patches -> Under Available updates click on the drop down and select Cloud Foundation 4.5 -> Download now.

Once the download is complete we can click on Update now

We can follow the status of the upgrade by clicking on the view status tab

Here we can see the different components that are getting upgraded

Once the upgrade is complete we are taken back to the previous page where we can see that the ESXi servers are next. The release notes can be found here. Click on Download Now

Once the download is complete we can click on Update now

If we have multiple clusters we can enable Cluster-level selection and select the specific cluster(s) we want to upgrade.

We can also enable sequential cluster upgrade as well as quick boot

We get to review the options once again before we click finish to to submit the task

Once submitted we can view the status by clicking on View Status

And with that we are finished with the workload domain. We can follow the same steps for the other domains

Don’t forget to clean up the download bundles by following the steps from my other blog here

Why Choose vRealize Automation (vRA) over Ansible

Ansible and vRealize Automation (vRA) are both popular DevOps tools for infrastructure automation and provisioning. However, the two tools have different strengths and use cases, and choosing the right one for your organization can be a challenge. In this blog post, we’ll explore the key differences between vRA and Ansible and why you might choose vRA over Ansible.

  1. Complexity of Deployment

Ansible is a simple, agentless tool that is easy to install and configure. However, as the complexity of your deployment increases, the simplicity of Ansible can quickly become a hindrance. vRA, on the other hand, is a complex tool that is designed to handle complex deployments, making it an ideal choice for large, complex environments.

  1. Integration with Other Tools

vRA integrates with a wide range of tools, including vSphere, NSX, and vRealize Operations, allowing you to manage and automate the entire software-defined data center. Ansible, on the other hand, does not have this level of integration, which can lead to a more fragmented environment.

  1. User Interfaces

vRA has a rich, web-based interface that allows you to easily manage and automate your infrastructure. The interface is intuitive and easy to use, even for those with limited technical skills. Ansible, on the other hand, is a command-line tool, making it more difficult for non-technical users to use.

  1. Scalability

vRA is designed to scale as your organization grows, allowing you to manage an increasing number of servers and applications. Ansible, while scalable, is not designed to handle the same level of scale as vRA, making it a less ideal choice for large enterprises.

  1. Cost

Ansible is open source, which means that it is free to use. vRA, on the other hand, is a commercial product that requires a license. While the cost of vRA may be a concern, the additional features and capabilities offered by vRA can make it a better choice for organizations that need a more robust automation solution.

In conclusion, while both Ansible and vRealize Automation have their strengths, vRA is a more powerful and scalable solution that is ideal for large, complex environments. The integration with other tools, rich web-based interface, and scalability make vRA a better choice for organizations that need a robust infrastructure automation solution.

Why Choose VMware vRealize Automation Over Puppet

When it comes to managing large, complex IT infrastructure, two of the most popular tools are VMware vRealize Automation (vRA) and Puppet. Both tools have their strengths and weaknesses, but in this article, we will examine why you might choose vRealize Automation over Puppet.

  1. Integrated Management: vRA integrates with VMware’s vSphere virtualization platform, allowing for a seamless management of virtual machines (VMs). With Puppet, you would need to use additional tools to manage your virtual environment.
  2. Cloud Management: vRA is capable of managing both on-premise and cloud infrastructure, making it an ideal solution for hybrid cloud environments. Puppet, on the other hand, is primarily focused on on-premise deployments.
  3. Automation: Automation is at the core of both vRA and Puppet. However, vRA provides a more comprehensive automation solution with its built-in workflows and drag-and-drop design. This makes it easier for users to automate their infrastructure without having to write complex code.
  4. Self-Service: vRA provides a self-service portal for users to request and manage their own resources, reducing the burden on IT. Puppet does not have this capability, making it a less attractive option for organizations looking to implement a self-service model.
  5. Cost: vRA is a commercial product and is typically more expensive than Puppet. However, the added features and integration with other VMware products make it a more cost-effective solution in the long run.

In conclusion, if you are looking for a comprehensive and integrated management solution that covers both on-premise and cloud environments, then vRealize Automation is the way to go. It provides a more user-friendly automation solution, with a self-service portal, making it easier for users to manage their infrastructure. However, if you are on a tight budget and have a primarily on-premise deployment, Puppet might be a better fit for your organization.

Why Choose VMware vRealize Automation (vRA) over Terraform

In the world of infrastructure as code (IAC), there are many tools to choose from. Two popular options are VMware vRealize Automation (vRA) and Terraform. While both have their strengths, there are compelling reasons to choose vRA over Terraform.

  1. End-to-End Automation: vRA automates the entire software-defined data center (SDDC) lifecycle, from provisioning to decommissioning. Terraform is more limited, focusing only on infrastructure provisioning.
  2. User Experience: vRA provides a user-friendly interface, making it easier for non-technical users to request and manage infrastructure. Terraform, on the other hand, requires more technical expertise to use effectively.
  3. Integration with VMware: vRA integrates with other VMware products, such as vSphere, NSX, and vSAN, allowing for a seamless experience. Terraform can also integrate with VMware, but it requires more manual effort to set up the integration.
  4. Enterprise-Grade Security: vRA includes enterprise-grade security features, such as role-based access control and multi-factor authentication. Terraform does not have built-in security features, requiring additional tools or manual effort to secure the environment.
  5. Robust Compliance Features: vRA includes compliance features, such as blueprints that enforce specific policies and standards, making it easier to meet regulatory requirements. Terraform does not have built-in compliance features, leaving it up to the user to ensure compliance.
  6. Strong Support: vRA has a large, global community of users and is backed by VMware, a well-established company in the tech industry. Terraform is a relatively new tool with a smaller community, making support and resources more limited.

In conclusion, vRA offers a complete automation solution for the SDDC, making it a great choice for enterprises that want a user-friendly interface, strong security features, robust compliance features, and strong support. Terraform, while a powerful tool, is better suited for infrastructure provisioning and requires more technical expertise and manual effort to secure and ensure compliance.

Why organizations should choose vRealize Automation as their automation solution

In our previous blog, we discussed the importance of automating virtual infrastructure and why now is the ideal time to do so. In this follow-up blog, we will delve deeper into why organizations should choose vRealize Automation as their automation solution.

  1. Improved efficiency: vRealize Automation streamlines the deployment and management of virtual infrastructure by automating manual processes, reducing the time and effort required to manage virtual resources. This leads to improved operational efficiency and reduces the risk of manual errors, which can be time-consuming and costly to rectify. With vRealize Automation, organizations can deploy and manage virtual resources in a matter of minutes, freeing up valuable IT resources to focus on more important tasks.
  2. Enhanced scalability: As businesses grow, their IT infrastructure must also grow to keep pace. vRealize Automation provides organizations with the ability to scale their virtual infrastructure as their business needs change, ensuring that their IT infrastructure can always meet the demands of their business. With vRealize Automation, organizations can easily deploy new virtual resources as required, without the need for manual intervention.
  3. Improved compliance and security: The deployment and management of virtual infrastructure must comply with various regulations and industry standards, such as HIPAA, PCI DSS, and ISO 27001. vRealize Automation provides robust security and compliance features, ensuring that virtual infrastructure is deployed and managed in a secure and compliant manner. With vRealize Automation, organizations can easily enforce security policies and ensure that their virtual infrastructure is in compliance with industry standards.
  4. Increased collaboration: vRealize Automation integrates with other VMware products, such as vSphere, NSX, and vSAN, enabling organizations to automate their entire virtual infrastructure. This improves collaboration between IT and development teams, as well as between different business units. With vRealize Automation, teams can work together to deploy and manage virtual infrastructure, ensuring that all virtual resources are deployed and managed in a consistent manner.
  5. Increased agility: In today’s fast-paced business environment, organizations must be able to quickly and easily deploy new products and services to meet customer demand. vRealize Automation provides organizations with the ability to quickly and easily deploy and manage virtual infrastructure, reducing the time to market for new products and services. With vRealize Automation, organizations can deploy new virtual resources in minutes, freeing up valuable IT resources to focus on other tasks.

In conclusion, vRealize Automation provides organizations with the tools and capabilities needed to automate their virtual infrastructure, resulting in improved efficiency, scalability, compliance, security, and agility. By automating manual processes, organizations can reduce the time and effort required to manage virtual resources, freeing up valuable IT resources to focus on more important tasks. To learn more about how vRealize Automation can benefit your organization, visit the VMware website.

SaltStack: The Ultimate Tool for Windows Patch Management

Windows systems are vulnerable to security threats and need to be regularly patched to protect against these threats. However, managing patches for a large number of Windows systems can be a tedious and time-consuming task. This is where SaltStack comes in to help.

SaltStack is a popular open-source configuration management and orchestration tool that can be used to manage Windows systems, including patch management. In this blog, we will discuss how to use SaltStack to patch Windows systems.

Installing the Salt Minion on Windows

Before you can use SaltStack to manage Windows systems, you need to install the Salt Minion software on each Windows system you want to manage. The Salt Minion is a lightweight software that allows the Salt Master to communicate with the Windows system and execute commands on it.

To install the Salt Minion on Windows, follow these steps:

  1. Download the Salt Minion MSI package from the SaltStack website.
  2. Double-click the MSI package to start the installation process.
  3. Follow the on-screen instructions to complete the installation.

Once the installation is complete, the Salt Minion will be running on the Windows system and will be ready to receive commands from the Salt Master.

Using the Salt Command to Install Updates

Once the Salt Minion is installed on a Windows system, you can use the salt command to install updates. The salt command allows you to run the built-in win_update module on a specific Windows system to install updates.

For example, the following command will install all available updates on a Windows system with the ID “windows-server-01”:

salt windows-server-name cmd.run 'salt-call win_update.update'

Using the win_updates State Module

SaltStack also provides the win_updates state module to manage updates on Windows systems. The win_updates state module allows you to define the desired state of your Windows systems, including which updates to install.

For example, the following command will install all available updates on all Windows systems managed by SaltStack:

salt '*' state.apply win_updates

Using the winrepo Feature

SaltStack’s winrepo feature allows you to manage custom Windows updates and patch packages. This feature allows you to create a local repository of Windows updates and patches that can be easily distributed to all of your Windows systems.

For example, the following command will update the local repository of custom packages on all Windows systems managed by SaltStack:

salt '*' state.apply winrepo_update

Conclusion

In this blog, we discussed how to use SaltStack to patch Windows systems. SaltStack provides a powerful and flexible solution for Windows patch management, allowing you to manage updates for a large number of Windows systems in an efficient and automated manner.

Whether you are managing a few Windows systems or hundreds, SaltStack is the ultimate tool for Windows patch management. So, start using SaltStack today and make your Windows patch management process a breeze!